
ComfyUI Video Generation: Wan Text-to-Video, Image-to-Video, and AnimateDiff
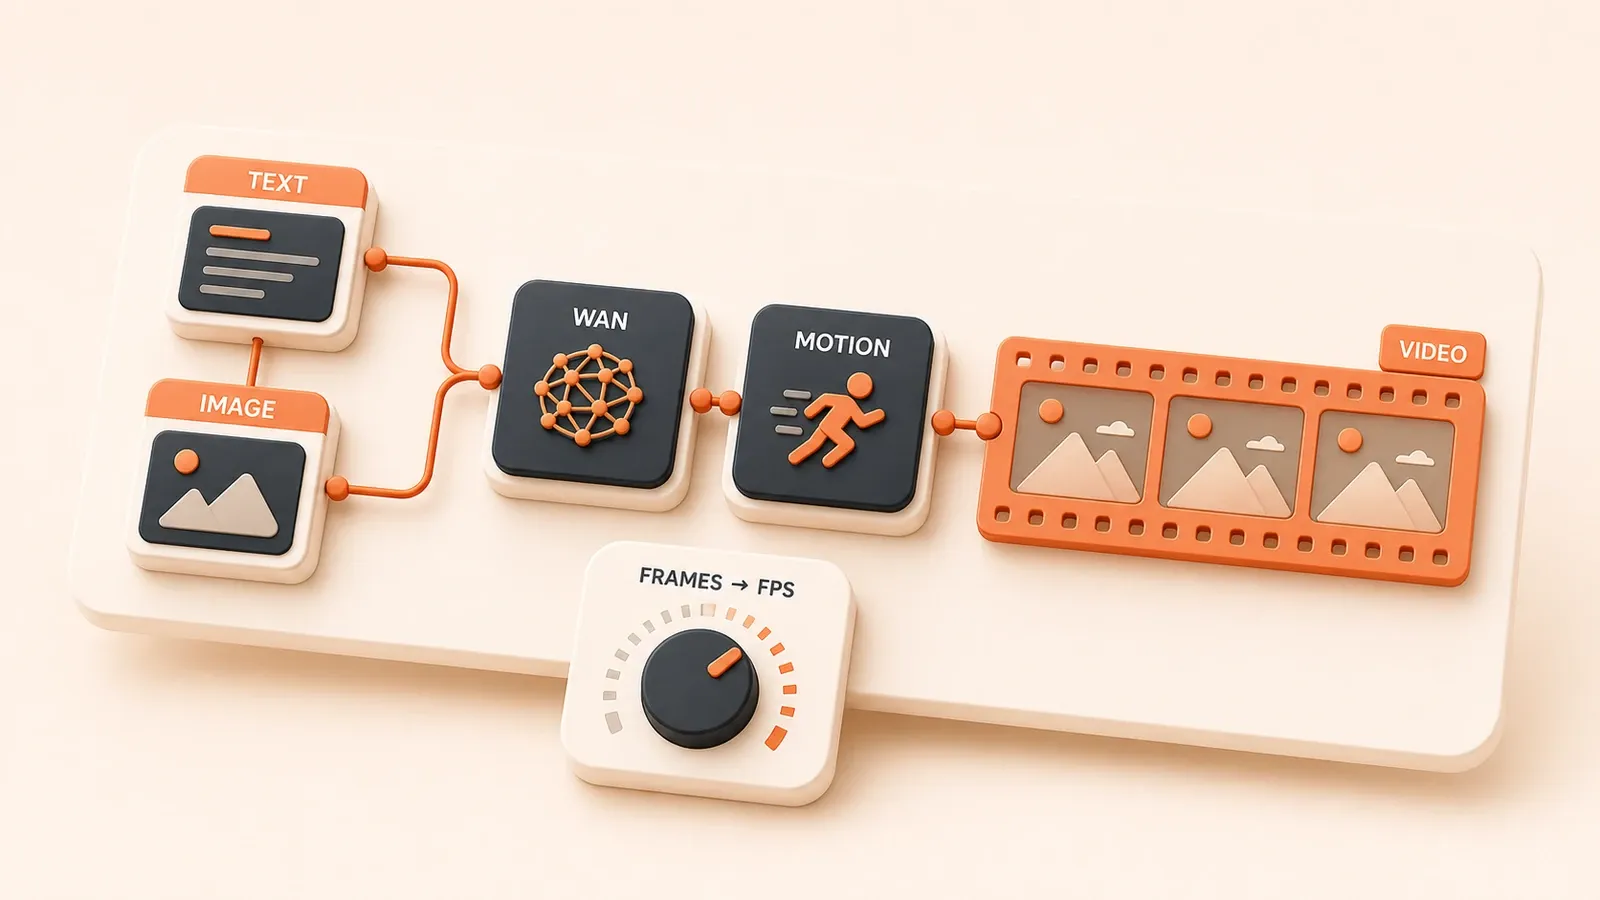
"The official ComfyUI Wan 2.2 tutorial provides text-to-video and image-to-video workflows, model locations, and precision options."
You can already produce a still character image you like in ComfyUI. The next step is making it move, but the imported video workflow lights up with Missing Nodes or VRAM immediately reaches 99%. Which route fits better, Wan or AnimateDiff? Where do the model files go? How should you balance frame count and VRAM, and how do you turn a folder of frames into an mp4? Start with route selection, a preparation checklist, and a conservative parameter budget, then work through the most common failures.
1. Choose a Route: Wan vs AnimateDiff
Choose the route before building the workflow. Wan and AnimateDiff are different types of systems with different prerequisites, use cases, and workflow complexity.
1.1 Wan: A Dedicated Video-Model Route
Wan 2.2 is an open video model family supporting text-to-video (T2V), image-to-video (I2V), and text-image-to-video (TI2V). It uses a mixture-of-experts architecture and has its own model weights, VAE, and text encoder. For some FP8 workflows, the official ComfyUI tutorial suggests starting with more than 16 GB of VRAM; original-precision variants generally need more. Wan fits projects that generate video from scratch and place a higher priority on temporal consistency.
Wan has a model ecosystem separate from a normal SD checkpoint. You therefore need the full set of files required by the workflow, such as the diffusion model, VAE, and text encoder. Short clips in the two-to-four-second range are a practical place to begin.
1.2 AnimateDiff: Adding Motion to the SD Ecosystem
AnimateDiff adds motion to compatible Stable Diffusion models such as SD 1.5 or SDXL. Its core component is a motion module that works alongside a base checkpoint. The exact model directory can change with AnimateDiff-Evolved releases, so follow the current README and the model selector shown by the node. A typical workflow loads an SD checkpoint and a compatible motion module to generate a short animation.
AnimateDiff works well when you already have style checkpoints and want short or stylized animation. You can reuse the SD checkpoint and VAE you already know, but duration and consistency depend on the base model, motion module, context settings, frame count, and resolution.
1.3 Wan vs AnimateDiff Decision Table
| Dimension | Wan 2.2 | AnimateDiff |
|---|---|---|
| Task type | Text-to-video, image-to-video, text-image-to-video | Short animation based on an SD model |
| Model ecosystem | Dedicated video-model ecosystem | SD 1.5/SDXL ecosystem |
| VRAM starting point | Some FP8 workflows start around the 16 GB class; original precision needs more | Depends on the base model, motion module, and settings; test at low resolution with few frames |
| Prerequisites | Wan diffusion model + VAE + text encoder | SD checkpoint + motion module |
| Best fit | New video generation and higher consistency requirements | Existing style models, short animation, and stylized clips |
| Workflow complexity | Higher: multiple model files and nodes | Medium: motion module plus base checkpoint |
Choose Wan when you want to generate a new clip and can accept a larger model stack and more nodes. Choose AnimateDiff when you already have a compatible stylized SD checkpoint, need a short animation, or want to avoid downloading a large dedicated video model.
2. Prepare the Wan Workflow
Preparation is where many Wan runs fail: a model is in the wrong folder, a node is missing, or the imported workflow targets a different task. A short checklist is faster than chasing each error after the queue starts.
2.1 Prepare the Model Files
Wan files must be in the locations expected by the workflow. Folder and filename mismatches are a common cause of an empty model selector.
Common Wan model folders:
| Folder | File type | Notes |
|---|---|---|
models/diffusion_models/ | T2V/I2V diffusion model | Variants may differ by 480P/720P and fp16/fp8 precision |
models/vae/ | Video VAE | Use the VAE required by the Wan workflow |
models/clip_vision/ | Vision encoder | Required by some I2V workflows |
models/text_encoders/ | Text encoder | Use the encoder specified by the workflow |
Precision choices:
- fp16: original precision and the highest VRAM requirement
- fp8: lower precision that can reduce VRAM pressure; use the current official workflow and your own logs to determine the real requirement
- bf16: use only when the hardware and workflow support it
Wan releases move quickly. Check the current official tutorial for the exact filenames, download links, and precision variants.
2.2 Install Custom Nodes
A video workflow may depend on several third-party node packs. VideoHelperSuite is commonly used for video import and export, while AnimateDiff workflows usually require ComfyUI-AnimateDiff-Evolved.
Installation steps:
- Open ComfyUI Manager and install the nodes listed by the workflow; install
ComfyUI-VideoHelperSuitewhen VHS is required - Install
ComfyUI-AnimateDiff-Evolvedif you choose the AnimateDiff route - Check ffmpeg and related dependencies against the current VideoHelperSuite README
- Restart ComfyUI
Check ffmpeg:
ffmpeg -versionIf the command returns version information, ffmpeg is available. If it returns command not found, install it with winget install ffmpeg on Windows, sudo apt install ffmpeg on Linux, or brew install ffmpeg on macOS.
2.3 Import a Workflow Template
For the first Wan run, use a T2V or I2V workflow from the official tutorial instead of assembling every node manually.
Import steps:
- Download the Wan T2V or I2V workflow JSON from the official tutorial
- Drag the JSON file, or an example image containing workflow metadata, into ComfyUI
- If Missing Nodes appears, search for each node in Manager or install the referenced repository manually
Missing Nodes troubleshooting order:
- Check whether ComfyUI Manager lists the required node pack as installed
- Search by the exact missing-node name
- If Manager cannot find it, clone the correct repository into
custom_nodes/ - Restart ComfyUI
See the ComfyUI workflow reuse guide for a more detailed import and missing-node checklist.
3. Run Wan Text-to-Video
Once the models and nodes are ready, run a minimal text-to-video workflow.
3.1 Key Workflow Nodes
A Wan T2V workflow usually includes nodes with these responsibilities; exact names depend on the current official template:
- Model loaders: load the Wan T2V diffusion model, VAE, and text encoder
- Video latent node: set width, height, and frames
- Text encoding: provide positive and negative prompts
- Sampling: configure steps, CFG, seed, and related options
- VAE Decode: decode the video frames
- VideoHelperSuite or an equivalent saver: combine the frames into a video file
The main differences from a still-image workflow are:
- You set
framesrather than generating a single image - You use the matching video VAE instead of an unrelated still-image VAE
- The output chain commonly includes both a frame sequence and a video-combining step
3.2 Write a Video Prompt
A video prompt needs temporal continuity that a still-image prompt does not.
Key points:
- Describe motion precisely: camera motion such as
camera followingorslow pan, and subject motion such aswalkingorturning head - Avoid scene changes: keep one continuous scene rather than writing “first in a park, then inside a cafe”
- Separate camera and subject motion: camera movement changes the viewpoint, while subject motion changes the content inside the frame
Example prompts:
A woman walking in a park, camera following from behind, soft sunlight, 4K
A cat playing with a ball, slow motion, bokeh background
See the Stable Diffusion prompt template guide for the underlying prompt structure.
3.3 Tune Frames, FPS, and Resolution
Frames, FPS, and duration are related by a simple formula:
| Parameter | Meaning | Common test values |
|---|---|---|
| frames | Total generated frames | 16/24/48/72 |
| FPS | Playback frames per second | 12/16/24/30 |
| duration | Seconds = frames / FPS | Calculate from the formula |
Examples:
- 48 frames @ 16 FPS = 3 seconds
- 72 frames @ 12 FPS = 6 seconds
Match the resolution to the model and workflow. Common templates distinguish between 480P and 720P routes.
More frames and a higher resolution generally increase pressure during sampling and VAE processing. Section 6 provides a conservative starting matrix.
3.4 Export the Video
Many Wan workflows generate a frame sequence first, then use Video Combine from VideoHelperSuite or a similar node to create a video.
Common save-node settings:
frame_rate: playback FPSformat: a format supported by the workflow, such as mp4, gif, or webpoutput_path: output location; the exact field depends on the current node version
Common export failures:
- Missing ffmpeg or node dependencies: follow the extension README and check
ffmpeg -version - Output-folder permissions: make sure ComfyUI can write to the destination
- Unsupported encoder: save the image frames first to verify generation, then select a format supported by the node
4. Run Wan Image-to-Video
Image-to-video uses a still image as the starting frame and generates motion from that state.
4.1 Connect the I2V Workflow
The main differences between Wan I2V and T2V are:
- Load Image: load a starting image at a size compatible with the workflow
- I2V model loader: load the corresponding Wan I2V diffusion model rather than a T2V variant
- CLIP Vision and text encoding: process the starting frame and prompt according to the workflow
- Sampling, VAE Decode, and Video Combine: generate and save the result
I2V and T2V may use different model files and workflow templates. Verify each download against the official template.
4.2 Prepare the Starting Image
The source image strongly affects later frames.
Requirements:
- Match the image size to the workflow
- Use a clear subject with clean object or character edges
- Avoid excessive detail: a crowded background or dense texture can make later frames drift
The starting image can come from ComfyUI or from an external source you have the right to use.
4.3 Troubleshoot I2V Settings
A common I2V failure starts with a recognizable first frame, followed by drifting faces and hands, deformation, or flicker.
Causes and fixes:
- Prompt and frame do not match: describe motion that makes sense for the source image
- The starting frame is too detailed: simplify the background or generate a cleaner source
- VRAM is exhausted: reduce frames, resolution, or precision
- Motion is too large: lower the relevant motion or strength setting when the workflow exposes one
Try another I2V model variant or seed when a particular model does not handle the source style well.

5. Prepare an AnimateDiff Workflow
AnimateDiff requires a different model stack from Wan.
5.1 Prepare the Motion Module
The motion module is the core AnimateDiff component. Its folder and compatible formats can change across AnimateDiff-Evolved releases, so use the extension’s current README, example workflow, and model selector as the source of truth.
At minimum, verify whether the module targets SD 1.5, SDXL, or another architecture and whether it matches the base checkpoint and workflow. Restart ComfyUI after downloading it and confirm that it appears in the AnimateDiff-Evolved loader.
5.2 Choose a Base Checkpoint
AnimateDiff does not replace the base model. It adds motion capabilities to a compatible image diffusion model.
Selection rules:
- Use an SD 1.5 or SDXL checkpoint compatible with the motion module and workflow
- Existing style checkpoints can work, but verify compatibility with a short-frame test
- Do not treat an ordinary checkpoint as a complete video model
See the Stable Diffusion model selection guide for checkpoint fundamentals.
5.3 Connect the Workflow
An AnimateDiff workflow usually includes these responsibilities:
- Checkpoint Loader: load a compatible base checkpoint
- Motion Model Loader: load a motion module or motion model
- Context Options: configure the context window
- Video latent node: set resolution and frame count
- Text encoding, sampling, VAE Decode, and video-combining nodes
The relationship between total frames and context length depends on the node release and workflow. Begin with compatible values from the example workflow, then change one setting at a time.
6. Set a Parameter and Performance Budget
VRAM and clip length are the main constraints in local video workflows. Treat these values as conservative starting points, not GPU guarantees.
6.1 VRAM, Frames, and Resolution Starting Matrix
| VRAM | Safer starting point | Worth testing | Avoid at first |
|---|---|---|---|
| 8 GB | AnimateDiff at low resolution, about 16 frames, batch 1 | Community low-VRAM workflows | High-resolution Wan, long clips, and multiple control branches |
| 12 GB | AnimateDiff with few frames and a small resolution | Low-precision Wan at a small size with few frames | Long 720P clips and complex post-processing |
| 16 GB | Follow official guidance for a short Wan FP8 test | Matching 480P or 720P templates | Multiple branches running together and long clips |
| 24 GB+ | More headroom for most short-video experiments | Higher resolution or more frames | Batch, VAE, and post-processing still need limits |
Actual requirements vary with model version, GPU architecture, VAE, custom nodes, and workflow implementation. Use the table only to choose a first test, not as a promise that a particular GPU will complete the run.
6.2 Reduce Load in This Order
When VRAM is insufficient, step settings down in this order:
- Reduce
frames, for example from 48 to 24 or 16 - Lower resolution from 720P to 480P or another size supported by the workflow
- Keep batch at 1 and disable unnecessary control and post-processing branches
- When supported, move from fp16 to fp8 or another lower-precision model
- Try spatial tiles and video temporal settings in VAEDecodeTiled or VAEEncodeTiled
- Use startup options such as
--lowvramwhen they are supported by the current release - Disable previews and close other GPU-heavy applications
Low-VRAM startup flags, caching, and tiled VAE settings need to be tested against the current ComfyUI release and workflow.
6.3 Balance Duration and Quality
Longer does not automatically mean better. Short clips are easier to control, while longer clips usually require smaller motion and a segmented workflow.
Risks include:
- Flicker: color or brightness changes between frames
- Deformation: faces, hands, or object outlines drift
- Weak motion: the prompt or motion settings do not specify enough movement
For a longer video, validate a short segment first and then use continuation, I2V, or post-production methods supported by the model and workflow. Doubling frames does not guarantee consistent motion.
7. Understand Video Output and Saving
Many ComfyUI video workflows produce a frame sequence first and use a node such as VideoHelperSuite to combine and save it.
7.1 VideoHelperSuite Node Responsibilities
| Node responsibility | Function | Common settings |
|---|---|---|
| Load Video | Import video or an image sequence | frame_count, frame_rate, width/height |
| Video Combine | Combine frames into video | frame_rate, format, output settings |
| Save Video-type node | Save the video file | format, quality, save_output |
Node names, parameters, and supported formats can change with the extension. Load Video imports an existing video, while Video Combine or an equivalent node turns generated frames into a video file.
7.2 Convert FPS, Frames, and Duration
Duration is calculated as:
duration (seconds) = frames / FPSExamples:
- 48 frames @ 16 FPS = 3 seconds
- 72 frames @ 12 FPS = 6 seconds
Common FPS choices:
| FPS | Effect |
|---|---|
| 12 | The same frames play for longer, but motion may look choppier |
| 16 | A compromise between duration and smoothness |
| 24 | The same frame sequence plays faster and ends sooner |
| 30 | More frames are required to preserve the same duration |
FPS controls playback speed; it does not generate missing in-between frames. A longer clip needs more frames or segmentation, while smoother motion may require interpolation or post-processing.
7.3 Troubleshoot Saving Failures
| Failure | Fix |
|---|---|
| ffmpeg or node dependency is missing | Follow the extension README and check ffmpeg -version |
| Output path is not writable | Give ComfyUI write access or use the default output folder |
| Encoder or format is unsupported | Save image frames first, then choose a format supported by the current node |
| No frames reach the saver | Check the latent, VAE Decode, and saver connections |
8. Troubleshoot Common Failures
Video workflows have several failure points. Work through them in order instead of changing unrelated settings at random.
8.1 Troubleshoot Missing Nodes
The imported workflow opens with red Missing Nodes blocks.
Fix them in this order:

- Check whether ComfyUI Manager shows the required custom node packs as installed
- Search by the exact missing-node name
- If Manager cannot find it, clone the correct repository into
custom_nodes/ - Restart ComfyUI
See the ComfyUI workflow reuse guide for more detail.
8.2 Fix Model-Path Errors
An incorrect model folder is a common cause of an empty selector.
| Model type | Common folder |
|---|---|
| Wan diffusion model | models/diffusion_models/ |
| Wan VAE | models/vae/ |
| CLIP Vision | models/clip_vision/ |
| text encoder | models/text_encoders/ |
| AnimateDiff motion module | Follow the current AnimateDiff-Evolved README and node model list |
Match the filenames to the workflow and distinguish task, resolution, and precision variants.
8.3 Troubleshoot OOM
VRAM exhaustion is the most common resource failure in video generation.
Use this order:
- Reduce frames, resolution, and model precision
- Keep batch at 1 and disable extra control or post-processing branches
- Try VAEDecodeTiled or a temporal chunk
- Use startup options such as
--lowvramwhen supported - Disable previews and close other GPU applications
8.4 Fix Flicker, Deformation, or Weak Motion
| Problem | Likely cause | Adjustment |
|---|---|---|
| Flicker | Weak temporal consistency or mismatched context/motion settings | Fix the seed, shorten the test, and adjust context or motion settings |
| Deformation | Complex starting frame, excessive motion, or model limitation | Simplify the frame, reduce motion, or choose a better-matched model or workflow |
| Weak motion | Prompt lacks explicit movement or motion strength is low | Add a concrete action and adjust supported motion settings carefully |
| Quality drops | Checkpoint, motion module, or VAE mismatch | Verify the model combination and return to an official or extension example workflow |
See the Stable Diffusion prompt template guide for prompt structure.
8.5 Fix a Stalled VAE Decode
VAE Decode stalls, runs extremely slowly, or runs out of memory.
Try these fixes:
- Reduce frames and resolution
- Try VAEDecodeTiled and adjust spatial tiles or temporal chunks when the node supports them
- Verify that the VAE matches the workflow
- If a model file is damaged, download it again from a trusted source and verify it
8.6 Fix I2V Drift After the First Frame
This is a common I2V failure pattern.
| Cause | Adjustment |
|---|---|
| Prompt does not match the starting frame | Describe motion that is consistent with the image |
| Starting frame is too detailed | Simplify the background or generate a cleaner frame |
| Motion is too large | Begin with subtle motion or slow camera push-in |
| I2V model does not fit the style | Try another model variant, workflow, or seed |
9. Continue with Control, Post-Processing, and Automation
After the first workflow runs end to end, choose the next direction based on the limitation you actually hit.
9.1 Related Guides in This Series
This is the video-generation chapter of the ComfyUI and Stable Diffusion practical series. Review these prerequisites when needed:
- ComfyUI beginner guide: make sure still-image generation works first
- ComfyUI workflow reuse guide: import JSON workflows and resolve custom nodes
- Stable Diffusion model selection guide: choose a compatible SD checkpoint
- Stable Diffusion prompt template guide: add motion and camera language to a solid prompt structure
Other entries in the series cover low-VRAM optimization, frame-by-frame repair, API automation, and complex version conflicts. Stabilize one short-video workflow before adding more controls or engineering layers.
9.2 Official Documentation and Project Resources
Start with official documentation and project repositories:
- ComfyUI documentation
- ComfyUI Wan2.2 Tutorial: the main source for the Wan route
- Wan-Video/Wan2.2 on GitHub: model variants and task types
- ComfyUI-AnimateDiff-Evolved: the ComfyUI AnimateDiff implementation
- ComfyUI-VideoHelperSuite: video import and export nodes
- VAEDecodeTiled documentation: tiled video VAE processing
- ComfyUI Startup Flags: low-VRAM startup options
9.3 Licensing and Commercial Use
Check the current license terms for every video model you use:
- Review the LICENSE file in Wan-Video/Wan2.2 for Wan 2.2 terms
- Review the LICENSE file in AnimateDiff for AnimateDiff terms
Before commercial use, verify:
- Whether the model license permits commercial use
- Whether you have the rights to the source material, especially an I2V starting image
- How generated-content rights apply to your project and distribution platform
This is not legal advice. The current repository license is the source of truth.
Conclusion
Wan and AnimateDiff serve different ComfyUI video workflows. Wan generates video from text or a starting frame; AnimateDiff reuses compatible style checkpoints for short animation. Match model folders, node versions, and template versions to the actual workflow. The parameter matrix is a conservative starting point, not a GPU guarantee. When resources are tight, reduce frames, resolution, branches, precision, and VAE load in that order.
For Missing Nodes, model-path errors, OOM, flicker, deformation, a stalled VAE Decode, or export failures, troubleshoot one layer at a time. Begin with few frames, a small resolution, and batch 1, confirm that the complete chain works, and then increase one variable per test.
Run Your First Short-Video Workflow in ComfyUI
Validate the complete path from route selection and model setup to a minimal test and video export.
- 1
Step 1: Verify the basic workflow
Confirm that ComfyUI can generate a still image reliably and that you can import a workflow, identify missing nodes, and inspect model paths. - 2
Step 2: Choose a video route
Use Wan T2V for text-to-video, Wan I2V for a starting frame, or evaluate AnimateDiff when you need to reuse an SD checkpoint. - 3
Step 3: Prepare the model files
Follow the actual workflow and official instructions to obtain the diffusion model, VAE, text encoder, CLIP Vision model, or motion module it requires. - 4
Step 4: Install the required nodes
Install the workflow's custom nodes through ComfyUI Manager and prepare a video-export extension such as VideoHelperSuite. - 5
Step 5: Run a minimal test
Start with few frames, a small resolution, and batch 1, without ControlNet, upscaling, or complex post-processing. - 6
Step 6: Combine and save the video
After frames are generated, set the frame rate and format and export through Video Combine, Save Video, or an equivalent node. - 7
Step 7: Increase one variable at a time
Keep the seed fixed and change one setting per test; if you hit OOM, flicker, or drift, step back through frames, resolution, precision, and VAE settings.
FAQ
Should I start with Wan or AnimateDiff for ComfyUI video?
What is the difference between frames and FPS in ComfyUI?
Why does ComfyUI output image frames instead of an mp4 file?
Can ComfyUI video run on 8 GB of VRAM?
Why does image-to-video drift away from the source image?
What should I do when video generation stalls at VAE Decode?
17 min read · Published on: Jul 23, 2026 · Modified on: Jul 23, 2026

ComfyUI & Stable Diffusion: Setup, Models, and Workflows
If you landed here from search, the fastest way to build context is to jump to the previous or next post in this same series.
Previous
ComfyUI Low-VRAM Optimization: Run SDXL, FLUX, and Video Workflows on 6–8GB GPUs
Run ComfyUI on 6–8GB GPUs by budgeting model weights, T5, VAE, resolution, and batch size, then troubleshoot OOM errors and slow FLUX or video workflows.
Part 13 of 16
Next
Automate Batch Image Generation with the ComfyUI API
Export a ComfyUI API-format workflow, submit it through /prompt, wait over WebSocket, download outputs, and add batching, queue limits, and backend job tracking.
Part 15 of 16


Comments
Sign in with GitHub to leave a comment