
How to Write AI Mini-Game Development Requirements: Scenes, Nodes, Components, and Interactions
You describe “make a jump function” to AI, and it gives you a pile of fragmented code that doesn’t run. You want to create a complete game level, but you don’t know how to explain the node tree structure clearly, and the hierarchy AI generates becomes a mess.
The problem isn’t AI’s capability. A vague prompt is like trying to cook without an ingredient list—AI can only improvise, and the result is completely different from what you imagined.
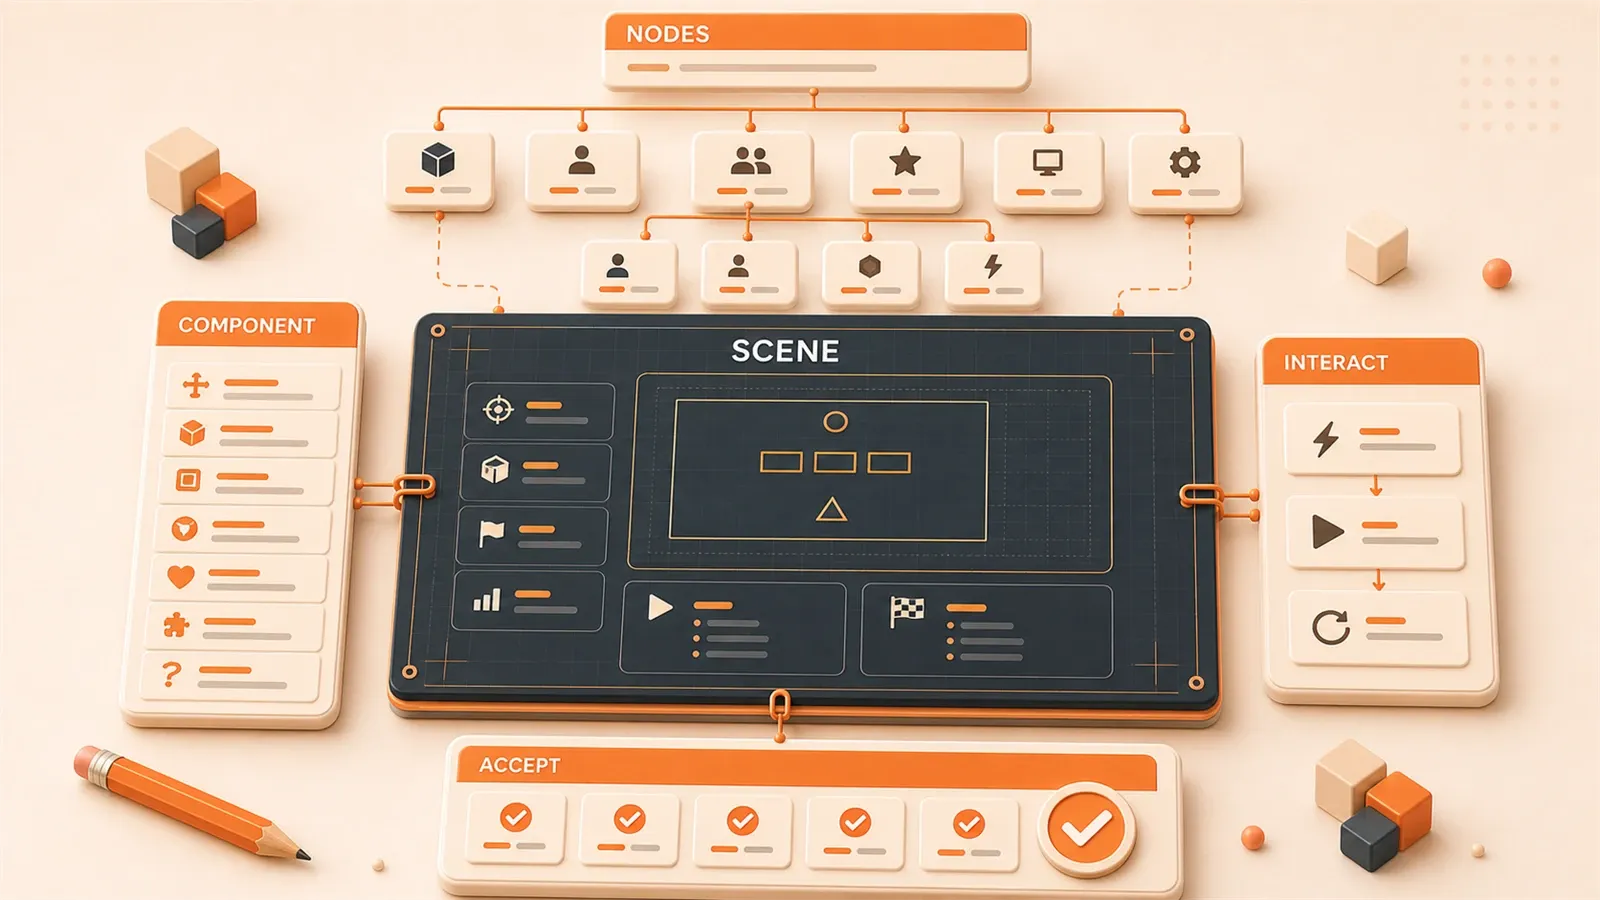
Game development requirements can actually be standardized. Scenes, nodes, components, interactions—these four core concepts all have corresponding description templates. This article shares a battle-tested methodology: the Scene Four-Elements Method, Node Tree JSON Format, Component Description Template, Interaction Five-Elements Formula, plus 5 ready-to-use Prompt templates.
If you’re building mini-games with Cocos Creator and want to boost efficiency with AI but keep hitting roadblocks, you’ll find the answers you need here.
Why Game Requirements Need Standardized Descriptions
Vague requirement descriptions are the number one killer in AI game development. I’ve tried directly saying “help me make a jump function,” and AI gave me a piece of player.y += 10 code—no physics system, no collision detection, no animation transitions. When it ran, the character teleported straight into the sky.
These problems have three typical symptoms.
First problem: AI can’t understand node hierarchy. You create a Player node in Cocos Creator with a HealthBar child node attached below to display the health bar. But if you only say “create a player,” AI won’t know HealthBar should exist as a child node. It might put HealthBar as an independent node in the scene root directory. When the code runs, the health bar won’t follow the player.
See the comparison:
❌ "Create a player"
✅ "Create a Player root node, mount a Sprite component to display the character texture, with a HealthBar child node displaying the health bar at relative position (0, 32)"
The second version makes the parent-child relationship clear, so AI-generated code won’t have hierarchical confusion.
Second problem: Component combination relationships are chaotic. Cocos Creator’s core architecture is “node + component”—nodes themselves are empty shells, components give them functionality. A Player node might mount four components: Sprite (display texture), RigidBody2D (physics rigid body), Collider (collision detection), PlayerScript (custom logic). If you only say “make the character movable,” AI might just give you a movement script, forgetting to mount the physics component. The character passes through walls with no collision feedback.
The correct description should list the component inventory:
❌ "Make the character movable"
✅ "Player node mounts RigidBody2D component (type: dynamic), child node Collider component (tag: 'player'), plus PlayerScript to handle keyboard input"
Third problem: Interaction logic is fragmented. You say “click button to jump,” AI gives you a touch event listener code snippet. But how long to jump, how high, whether you can jump again while jumping, how to restore state after jumping—these details aren’t handled. The code runs, clicking the button does make the character move, but animation stutters, states lock up, continuous clicking causes bugs.
A complete interaction description should contain five elements: trigger condition, event type, target object, response behavior, state change. This will be expanded later—just remember the formula for now:
Interaction Description = Trigger Condition + Event Type + Target Object + Response Behavior + State ChangeThe root of vague descriptions is lack of structured thinking. AI needs clear context, specific instructions, clear boundary conditions. In prompt engineering, there’s a CREATE framework originally a best practice for general programming, equally effective in game development:
| Field | Game Development Application |
|---|---|
| C - Context | Provide engine version (Cocos Creator 3.8), project structure, existing code style |
| R - Role | Clarify AI is a “Cocos Creator development expert” |
| E - Example | Provide expected node tree JSON format examples |
| A - Action | Clarify what to do (create nodes, mount components, listen to events) |
| T - Tone | Specify code style (TypeScript + Cocos Creator API) |
| E - Edge | Explain constraints (FPS ≥ 60, node count ≤ 50) |
The core logic of this framework: break down “what to do” into “under what conditions,” “using what tools,” “achieving what standards.” The following four chapters will turn the CREATE framework into replicable templates across four dimensions: scenes, nodes, components, interactions.
Scene Four-Elements Method
Scenes are the top-level concept in game development. A complete scene description contains four elements: type, style, elements, interaction points. Fill these four items clearly, and AI can generate a level with a complete skeleton.
First, let’s define the four elements:
| Element | Definition | Description Method |
|---|---|---|
| Scene Type | Game level / Interface / Menu | ”A {type} scene, containing {elements}“ |
| Visual Style | 2D / 3D, Pixel / Realistic | ”Using {style} art style, referencing {game name}“ |
| Core Elements | Player, enemies, items, UI | ”Contains {count} {type} objects, position {coordinates}“ |
| Interaction Points | Clickable / Collidable areas | ”Define {count} interaction areas, triggering {event}” |
The core of this method: first determine the scene’s “skeleton” (type + style), then fill in “content” (elements + interaction points). Like building a house—draw the blueprint first, then arrange furniture inside.

Let’s look at a practical example. You want to create a Sokoban game level—how do you write the description?
[Scene Description]

Scene Type: A Sokoban game level scene
Visual Style: Using minimalist geometric style, solid color background, grid size 64x64

Core Elements:
  - 1 Player node (position: row 1, column 1)
  - 3 Box nodes (positions: row 2 column 2, row 3 column 4, row 5 column 2)
  - 3 Target nodes (target positions, displayed as sunken squares)
  - Wall nodes (surrounding scene boundary)

Interaction Points:
  - Player can push Box, collision detection triggers displacement
  - Box reaching Target triggers victory detection
  - Scene boundary collision triggers blocking

[Technical Constraints]

Engine: Cocos Creator 3.8
Language: TypeScript
Performance: FPS ≥ 60, node count ≤ 50
This description covers all four elements. Type is “Sokoban level,” style is “minimalist geometric,” elements list specific positions for Player, Box, Target, and Wall objects, interaction points define three core logics: pushing boxes, victory detection, boundary blocking. Technical constraints are listed separately to ensure AI-generated code meets performance requirements.
Here’s a detail worth noting: core element positions are described using “row N, column N” rather than direct pixel coordinates. The benefit: AI will automatically convert to pixel coordinates based on grid size (64x64) (row 1 column 1 = (64, 64)). Code is more flexible—when changing grid size, you don’t need to manually adjust all coordinates.
Here’s another template you can copy and use directly:
## Scene Description Template

[Basic Information]

- Scene Name: {sceneName}
- Scene Type: {type: battle scene / menu scene / settlement scene}
- Visual Style: {style description}

[Core Elements List]

1. {nodeName}: {count} items, initial position ({x}, {y})
2. {nodeName}: {count} items, function description
3. ...

[Interaction Points Definition]

- {interactionPointName}: trigger condition {condition}, response behavior {behavior}
- {interactionPointName}: ...

[Technical Requirements]

- Engine Version: {version}
- Language: {TypeScript / JavaScript}
- Performance Metrics: {FPS / node count / memory}
This template fits most 2D mini-game scenes. Fill in the four elements, and AI can generate a structurally complete level skeleton. Chapter 3 will explain how to expand the “Core Elements List” into node tree JSON format so AI understands hierarchical relationships.
Node Tree Standard Description Format
The node tree is the core data structure of Cocos Creator scenes. Each node can have child nodes that inherit the parent node’s position (relative coordinates), forming a tree. The clearest way to describe a node tree to AI is using JSON format.
Why JSON? Because it’s structured, parseable, and AI can directly understand it. You give a piece of JSON, and AI knows who the root node is, what child nodes exist, what components each node has, and what properties they have. When generating code, AI creates nodes layer by layer according to the JSON hierarchy without messing up parent-child relationships.
First, let’s look at a standard node tree JSON structure:
{
  "rootNode": "Scene",
  "tree": {
    "Player": {
      "components": ["Sprite", "RigidBody2D", "PlayerScript"],
      "position": {"x": 100, "y": 200},
      "properties": {
        "size": {"width": 64, "height": 64},
        "anchor": {"x": 0.5, "y": 0.5}
      },
      "children": {
        "HealthBar": {
          "components": ["ProgressBar"],
          "position": {"x": 0, "y": 32}
        },
        "Weapon": {
          "components": ["Sprite"],
          "position": {"x": 48, "y": 0}
        }
      }
    },
    "Enemies": {
      "components": [],
      "children": {
        "Enemy1": {
          "components": ["Sprite", "EnemyScript"],
          "position": {"x": 300, "y": 150}
        },
        "Enemy2": {
          "components": ["Sprite", "EnemyScript"],
          "position": {"x": 400, "y": 250}
        }
      }
    },
    "UI": {
      "components": [],
      "children": {
        "ScoreLabel": {
          "components": ["Label"],
          "content": "Score: 0"
        },
        "PauseButton": {
          "components": ["Button"],
          "onClick": "pauseGame()"
        }
      }
    }
  }
}
This JSON describes a simple battle scene. The root node is Scene, with three top-level nodes below: Player (player), Enemies (enemy container), UI (interface). Player has two child nodes attached: HealthBar and Weapon. When AI reads this JSON, it knows HealthBar should be created as a child node of Player, with position relative to Player at (0, 32).
There are three key points to remember about node tree descriptions.
First key point: Parent-child relationships must be explicit. Child node positions are offsets relative to parent nodes. For example, HealthBar’s position is (0, 32), meaning it’s 32 pixels directly above Player. If Player moves to (200, 300), HealthBar automatically follows to (200, 332). This mechanism ensures the health bar always follows the player.
If you put HealthBar in the scene root node instead of as Player’s child node, the health bar won’t follow the player. I’ve fallen into this trap: AI-generated code put all UI elements in the root node. When it ran, I found the health bar separated from the player—the health bar stayed in place while the player moved. Later I switched to using JSON format to describe node trees, and AI-generated code had correct hierarchical relationships.
Second key point: Component composition, not inheritance. Cocos Creator’s design philosophy is “nodes are entities, components give functionality.” A node itself has no behavior—mount a Sprite component to display images, mount RigidBody2D to have physics properties, mount Script to have custom logic. This compositional design is more flexible than inheritance-based design—you can mount Sprite + RigidBody + Script on Player, mount Sprite + RigidBody + EnemyScript on Enemy. Two nodes share some components but have independent scripts.
JSON uses a components array to describe the component list. AI will mount components one by one in array order, with each component’s properties supplemented in properties.
Third key point: Node naming should be standardized. Follow camelCase naming (Player, Enemy, HealthBar), functional nodes can use underscores (bg_sprite, ui_canvas). The benefit of clear naming: AI-generated code has consistent variable names, and when you maintain code later, you can see node purpose at a glance.
Here’s another practical example: a shooter game node tree. This JSON can be sent directly to AI to generate complete scene code:
{
  "rootNode": "GameScene",
  "tree": {
    "Player": {
      "components": [
        "Sprite(texture path: assets/player.png)",
        "RigidBody2D(type: dynamic, gravityScale: 0)",
        "Collider(tag: 'player')",
        "PlayerScript"
      ],
      "position": {"x": 200, "y": 400},
      "properties": {"size": {"width": 64, "height": 64}},
      "children": {
        "BulletSpawnPoint": {"position": {"x": 32, "y": 0}}
      }
    },
    "Enemies": {
      "children": [
        {
          "Enemy1": {
            "components": ["Sprite", "Collider(tag: 'enemy')"],
            "position": {"x": 600, "y": 200}
          }
        },
        {
          "Enemy2": {
            "components": ["Sprite", "Collider(tag: 'enemy')"],
            "position": {"x": 700, "y": 300}
          }
        }
      ]
    },
    "Bullets": {
      "components": [],
      "description": "Bullet pool container, dynamically creates Bullet nodes"
    },
    "UI": {
      "children": {
        "ScoreLabel": {"components": ["Label"], "content": "Score: 0"},
        "RestartButton": {"components": ["Button"], "onClick": "restartGame()"}
      }
    }
  }
}
This JSON has several details worth noting:
- Player has a BulletSpawnPoint child node, position (32, 0), this node is the bullet spawn point, offset 32 pixels relative to player
- Enemies is a container node with multiple Enemy child nodes listed in array form
- Bullets is a bullet pool container, the
descriptionfield explains it’s a parent node for dynamically creating Bullet nodes - UI’s RestartButton has an
onClickproperty that directly binds a callback function name
When sending to AI, add technical constraints:
Please create a Cocos Creator scene based on the node tree JSON above.

Requirements:
1. Use Cocos Creator 3.8 API
2. TypeScript code with type annotations
3. Script components use @ccclass decorator
4. Event listeners use node.on() method
AI will generate complete scene creation code according to the JSON hierarchy, including three steps: node creation, component mounting, property setting. After getting the code, you only need to fill in specific logic for script components, and the scene skeleton is complete.
Component Description Template
Components are carriers of node functionality. To describe components to AI, the core is to clearly explain four fields: function, properties, dependencies, example configuration. This template fits all Cocos Creator built-in components and custom script components.
First, let’s define the four fields:
| Field | Required | Description |
|---|---|---|
| Function | Required | What the component does (one sentence) |
| Properties | Required | Configuration parameters (type + description) |
| Dependencies | Optional | What properties/other components the node needs |
| Example Config | Recommended | Typical configuration values |
The logic of this template: first tell AI the component’s purpose (function), then list adjustable parameters (properties), finally explain prerequisites (dependencies). AI will generate component mounting code following this structure, filling in property values according to example configuration.
Let’s look at a practical example: Sprite component description.
## Component Name: Sprite

**Function**: Display image textures, most commonly used rendering component in 2D games

**Properties**:

- spriteFrame: SpriteFrame - Image resource | Default: null
- sizeMode: SizeMode - Size mode (CUSTOM / RAW / TRIMMED) | Default: TRIMMED
- type: SpriteType - Render type (SIMPLE / SLICED / TILED / FILLED) | Default: SIMPLE

**Dependencies**:

- Requires node to have: size property (when sizeMode = CUSTOM)

**Example Config**:

spriteFrame: assets/player.png
sizeMode: RAW
This description lists all core properties of the Sprite component. When AI reads this, it will generate code like this:
const sprite = node.addComponent(Sprite);
sprite.spriteFrame = assets.player;
sprite.sizeMode = SizeMode.RAW;
Here’s another physics component example: RigidBody2D.
## Component Name: RigidBody2D

**Function**: 2D physics rigid body, gives node physics properties (gravity, collision)

**Properties**:

- type: RigidBodyType - Rigid body type (STATIC / DYNAMIC / KINEMATIC) | Default: STATIC
- gravityScale: number - Gravity coefficient | Default: 1.0
- linearVelocity: Vec2 - Linear velocity | Default: (0, 0)

**Dependencies**:

- Requires other components: Collider2D (for collision detection)

**Example Config**:

type: DYNAMIC
gravityScale: 0.5
linearVelocity: (100, 0)
There’s a dependency field here: RigidBody2D needs to work with Collider2D for collision detection. When AI reads this dependency, it will remind you to mount a Collider2D component on the same node, or automatically add it for you.

Let me share a common pitfall. I previously described to AI “give the character physics properties,” and AI only gave me RigidBody2D, no Collider. The code ran, the character did fall due to gravity, but passed straight through the ground—no collision detection. Later I used the component description template, added the dependency field, and AI-generated code mounted both RigidBody2D + Collider2D.
Let’s summarize the standard format of the component description template:
## Component Name: {ComponentType}

**Function**: {One-sentence description of component function}

**Properties**:

- {propertyName}: {type} - {description} | Default: {default}
- {propertyName}: {type} - {description} | Default: {default}

**Dependencies**:

- Requires node to have: {Node property} (e.g., size, anchor)
- Requires other components: {Component name} (e.g., RigidBody2D)

**Example Config**:

{property}: {value}
{property}: {value}

**Code Example**:

```typescript
// Get component
const sprite = this.node.getComponent(Sprite);
sprite.spriteFrame = newSpriteFrame;
This template fits all Cocos Creator built-in components (Sprite, Label, Button, RigidBody2D, Collider2D, etc.) and also works for custom script components. If you want to create a PlayerScript component, describe it using the same template:
## Component Name: PlayerScript

**Function**: Custom logic handling player movement, jumping, collision response

**Properties**:

- moveSpeed: number - Movement speed | Default: 200
- jumpHeight: number - Jump height | Default: 100
- health: number - Current health value | Default: 100

**Dependencies**:

- Requires node to have: RigidBody2D component (for physics movement)
- Requires node to have: Collider2D component (for collision detection)

**Example Config**:

moveSpeed: 300
jumpHeight: 150
health: 100
When AI reads this description, it will generate a complete PlayerScript TypeScript class, including properties defined with @property decorator, lifecycle methods like onLoad / start / update, and custom methods like move / jump / takeDamage. After getting the code, you only need to fill in specific logic, and the skeleton is already complete.
Interaction Description Formula
Interaction is the core of game logic. Player clicks button, character collides with enemy, bullet hits target—these are all interactions. The clearest way to describe interactions to AI is using the five-element formula:
Interaction Description = Trigger Condition + Event Type + Target Object + Response Behavior + State ChangeMeaning of the five elements:
- Trigger Condition: What circumstances trigger (collision, click, keyboard input)
- Event Type: Specific event name (TOUCH_START, onCollisionEnter)
- Target Object: Which node/component responds to event
- Response Behavior: What method/function to execute
- State Change: How data/visuals change
This formula ensures interaction descriptions form a complete loop. Missing any element, AI-generated code will have bugs.
For example. You say “click button to jump,” AI only gives you touch event listener code, but doesn’t explain how high to jump, how long, how to restore state after jumping. The code runs, clicking the button does make the character move, but animation stutters, states lock, continuous clicking causes issues.
The correct description should clearly write out all five elements:
## Interaction Name: Click Jump

[Trigger Condition]

- Trigger Method: Touch click
- Trigger Object: JumpButton node
- Trigger Timing: TOUCH_END (finger leaves screen)

[Event Listener]

- Listener Node: JumpButton
- Event Type: Node.EventType.TOUCH_END
- Callback Function: onJumpButtonClicked

[Response Behavior]

- Execute Method: PlayerScript.jump()
- Parameter Passing: height = 100, duration = 0.3

[State Change]

- Data Change: Player.position.y += 100
- Visual Change: Player node plays jump animation (scale: 1.0 → 1.2 → 1.0)
- State Change: Player.isJumping = true (duration 0.3 seconds)

[Code Implementation]

```typescript
jumpButton.on(Node.EventType.TOUCH_END, (event) => {
  const playerScript = player.getComponent(PlayerScript);
  playerScript.jump({ height: 100, duration: 0.3 });
}, this);
This description covers all five elements. When AI reads this, it will generate complete touch event listener code, including callback functions, parameter passing, state management. After getting the code, you only need to fill in the specific implementation logic of the jump() method.

Here's another collision interaction example:

```markdown
## Interaction Name: Collision Damage Detection

[Trigger Condition]

- Trigger Method: Collision detection
- Trigger Object: Player node Collider + Enemy node Collider
- Trigger Timing: onCollisionEnter (collision start)

[Event Listener]

- Listener Component: Player node's Collider component
- Event Type: Collider2D.onCollisionEnter
- Callback Function: onPlayerHitEnemy

[Response Behavior]

- Execute Method: PlayerScript.takeDamage(amount)
- Parameter Passing: damage = 10

[State Change]

- Data Change: Player.health -= 10
- Visual Change: Player node plays flash white animation (0.1 seconds)
- State Change: Player.isHurt = true (duration 0.2 seconds)

[Code Implementation]

```typescript
onCollisionEnter(self: Collider2D, other: Collider2D) {
  if (other.tag === 'enemy') {
    const playerScript = this.node.getComponent(PlayerScript);
    playerScript.takeDamage(10);
    this.flashWhite(0.1);
  }
}
Here's a detail worth noting: the trigger objects are Collider components of two nodes, trigger timing is onCollisionEnter. When AI reads this, it knows to listen for collision events on Player's Collider component, and after determining the collision object's tag is 'enemy', execute damage logic.

A common pitfall in interaction descriptions: state changes aren't clearly explained. I previously described "collision with enemy causes health loss" to AI, and AI gave a piece of `health -= 10` code, but didn't add visual feedback (flash white animation) and state locking (isHurt). The code ran, player colliding with enemy did lose health, but no visual indication—the player didn't know they were hurt, and continuous collisions would instantly drain all health.

Later I used the five-element formula, added state changes, and AI-generated code included flash white animation and state locking, making the interaction experience complete.

Here's a standard interaction description template:

```markdown
## Interaction Name: {Interaction Description}

[Trigger Condition]

- Trigger Method: {touch / keyboard / collision}
- Trigger Object: {nodeName}
- Trigger Timing: {TOUCH_START / TOUCH_END / onCollisionEnter}

[Event Listener]

- Listener Node: {nodeName}
- Event Type: Node.EventType.{eventType}
- Callback Function: {functionName}

[Response Behavior]

- Execute Method: {scriptName}.{methodName}
- Parameter Passing: {parameterList}

[State Change]

- Data Change: {variableName} = {newValue}
- Visual Change: {animation / color / position change}
This template fits touch interactions (clicking buttons, sliding screen), collision interactions (character hitting enemy, bullet hitting target), keyboard interactions (arrow keys movement, spacebar jump). Fill in all five elements, and AI can generate complete event listener code.
Cocos Creator’s touch events have four types, listed here for reference:
| Event Type | Trigger Timing |
|---|---|
| TOUCH_START | Finger presses screen |
| TOUCH_MOVE | Finger slides on screen |
| TOUCH_END | Finger leaves screen |
| TOUCH_CANCEL | Touch cancelled by system (e.g., interrupted by incoming call) |
The listening method is node.on(Node.EventType.{eventType}, callback, target). When destroying, use node.off() to cancel listening to avoid memory leaks. These details are reflected in the template, and AI will generate code according to specifications.
5 Practical Prompt Templates
Previously covered the Scene Four-Elements Method, Node Tree JSON Format, Component Description Template, and Interaction Five-Elements Formula. To implement these four methodologies in Prompts, a standard format is needed. Here are 5 ready-to-use templates covering five scenarios: creating scenes, creating nodes, implementing interactions, creating scripts, optimizing performance.
Template 1: Create Complete Scene
[Role] You are a Cocos Creator development expert, proficient in TypeScript and node-component architecture.

[Task] Create complete code for the following game scene.

[Scene Description]

Scene Type: {type}
Visual Style: {style}
Core Elements: {nodeList}
Interaction Points: {interactionList}

[Node Tree Structure]

```json
{nodeTreeJSON}
[Technical Requirements]
- Engine: Cocos Creator 3.8
- Language: TypeScript, using @ccclass decorator
- API: Use official Cocos Creator API (node.getComponent, node.on, etc.)
[Output Requirements]
- Scene code (complete node creation logic)
- Script code (including type annotations and comments)
- Event listener code (interaction logic)
### Template 2: Create Node and Mount Components
[Role] Cocos Creator TypeScript Developer
[Task] Create {nodeName} node and mount {componentList} components
[Node Properties]
- Name: {nodeName}
- Position: ({x}, {y})
- Size: {width}x{height}
- Anchor: ({anchorX}, {anchorY})
[Component Configuration]
- {componentName}:
- {property}: {value}
- {componentName}:
- {property}: {value}
[Output Requirements]
- TypeScript code with type annotations
- Use Cocos Creator 3.8 API
- Add comments explaining each line of code
### Template 3: Implement Interaction Logic
[Role] Cocos Creator Event System Expert
[Task] Implement the following interaction logic
[Interaction Description]
Trigger Condition: {triggerCondition}
Event Type: {eventType}
Target Object: {nodeName}
Response Behavior: {methodName}
State Change: {changeDescription}
[Technical Constraints]
- Use node.on to listen for events
- Use Node.EventType enum for event types
- Callback functions include event parameter
- Use node.off to cancel listening when destroying
[Output Requirements]
- TypeScript code
- Include complete listening, callback, and destruction logic
- Add error handling (node doesn’t exist, component missing)
### Template 4: Create Script Component
[Role] Cocos Creator Script Development Expert
[Task] Create {scriptName} script component
[Script Function]
{functionDescription}
[Property Definition]
@property({type})
{propertyName}: {type} = {defaultValue}
[Method List]
- {methodName}({parameters}): {returnType}
- Function: {description}
- {methodName}({parameters}): {returnType}
- Function: {description}
[Lifecycle]
- onLoad: {initializationLogic}
- start: {startupLogic}
- update(dt): {perFrameUpdateLogic}
[Output Requirements]
- TypeScript code, using @ccclass and @property decorators
- Include complete lifecycle methods
- Add type annotations and comments
### Template 5: Optimize Node Tree Performance
[Role] Cocos Creator Performance Optimization Expert
[Task] Optimize the performance of the following node tree structure
[Current Node Tree]
{nodeTreeJSON}[Performance Issues]
- Too many nodes: {count}
- High DrawCall: {count}
- Large memory usage: {size}
[Optimization Goals]
- FPS: ≥ 60
- DrawCall: ≤ 20
- Memory: ≤ 100MB
[Optimization Strategy]
- Merge nodes: {mergePlan}
- Use node pool: {reusePlan}
- Optimize components: {componentOptimizationPlan}
[Output Requirements]
- Optimized node tree JSON
- TypeScript optimization code
- Performance comparison data (before vs after optimization)
These five templates cover the complete process of AI game development: from scene creation to node mounting, from interaction implementation to script writing, finally to performance optimization. Each template follows the CREATE framework: Context (role setting), Action (task description), Edge (technical constraints, performance metrics), Example (node tree JSON examples).

When using, just copy the template and replace content in `{}`. For example, Template 2—if you want to create a Player node, change `{nodeName}` to `Player`, `{componentList}` to `Sprite, RigidBody2D, PlayerScript`, fill in properties according to actual needs. AI will generate complete code following the template, saving you time writing prompts from scratch.

## Summary

This article covered four methodologies and five practical templates. Let's review the key takeaways:

**Scene Description Four Elements**: Type, style, elements, interaction points. First determine the scene skeleton, then fill in content—AI generates a structurally complete level.

**Node Tree JSON Format**: Root node → child nodes → components → properties → position. Use structured format to describe hierarchical relationships—AI creates nodes layer by layer according to tree structure without messing up parent-child relationships.

**Component Description Four Fields**: Function, properties, dependencies, example configuration. First explain purpose, then list parameters, finally explain prerequisites—AI generates component mounting code following this structure.

**Interaction Description Five Elements**: Trigger condition, event type, target object, response behavior, state change. Five elements form a complete loop—AI-generated code won't have omissions.

These four methodologies are implemented in Prompts through five practical templates: create scene, create node, implement interaction, create script, optimize performance. Templates follow the CREATE framework—just copy and replace `{}` content to use.

Next time you describe game requirements to AI, try using JSON format to describe node trees, use the five-element formula to describe interaction logic. Compare before and after: vague descriptions generate fragmented code with chaotic hierarchy and missing interactions; standardized descriptions generate complete code with clear hierarchy and closed-loop interactions. The efficiency improvement is tangible.
16 min read · Published on: May 23, 2026 · Modified on: Jul 14, 2026

AI-Assisted Cocos Mini Game Development
If you landed here from search, the fastest way to build context is to jump to the previous or next post in this same series.
Previous
Developing Cocos Mini-Games with AI Assistance: My Complete Workflow and Efficiency Comparison
Sharing my complete AI-assisted Cocos mini-game development workflow, including tool selection matrix, five-stage practical experience, and efficiency comparison data—from planning to launch in 3 days, achieving 10x efficiency improvement.
Part 16 of 21
Next
Solo Game Development: What to Delegate to AI, What to Judge Yourself
How should indie game developers decide which tasks to delegate to AI and which to handle personally? This article provides a clear decision framework covering code generation, art production, and creative decisions to help you build a complete cognitive map for AI collaboration.
Part 18 of 21


Comments
Sign in with GitHub to leave a comment