
Mini-Game State Machine Design: Complete Flow from Home to Battle to Settlement
"80% of card game bugs come from poor state design; state machines effectively solve the problem of scattered state judgments."
"Nested state machines have become the mainstream design pattern for complex games; Battle State can contain BeginBattle, HeroTurn, EnemyTurn, EndBattle as four sub-states."
Your mini-game ships; players report the settlement screen stuck—match over, UI still shows combat. You open the code: if (isPlaying && !isPaused && !isGameOver && hasPlayerLeft) everywhere. Yeah, I wrote that mess too.
On a card game I hit the same wall—booleans scattered across files, one feature touching a dozen places. Multiplayer hurt worse: server in settlement, client still playing fight animations.
A state machine refactor cleaned it up.
We’ll layer flow: app → battle → combat details, plus locks, server checks, and timeouts that matter in production.
Why Do Mini-Games Need State Machines?
Simply put, games are a bunch of states switching back and forth.
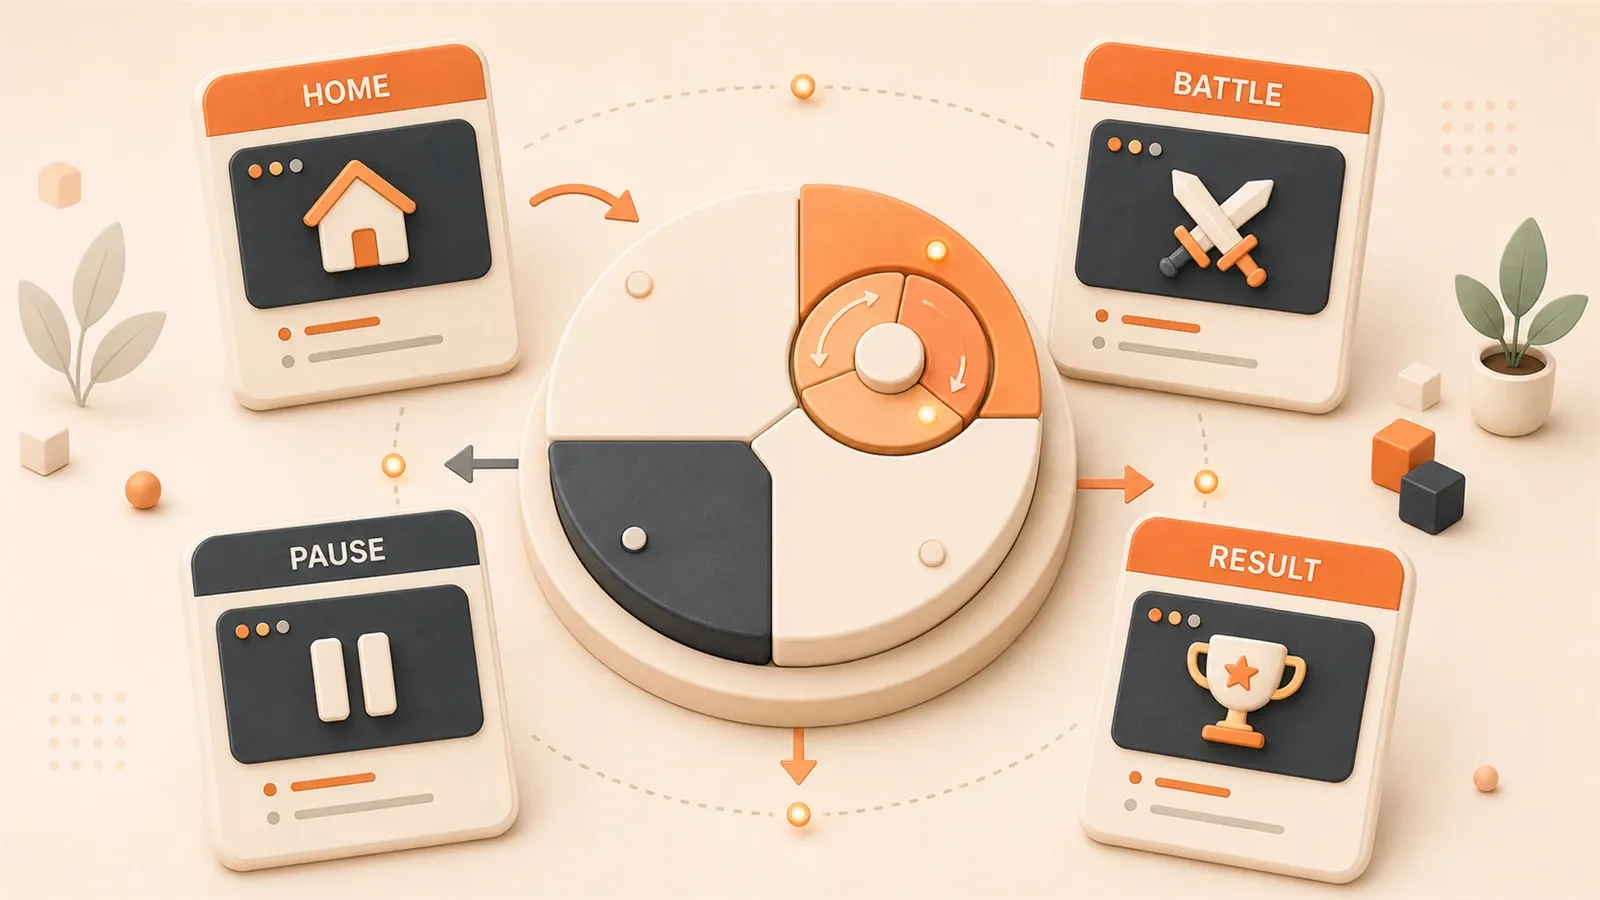
Home, battle, settlement, pause, spectating—each screen is backed by one state. Player clicks “start game,” home disappears, battle interface appears. Battle ends, settlement pops up. Sounds simple, but code gets messy.
Three Sins of the if-else Waterfall
Look at this code—you’ve probably seen similar:
// State judgments scattered everywhere
if (isPlaying && !isPaused && !isGameOver) {
  // Player can operate
}

if (isGameOver && !hasShownResult) {
  // Show settlement interface
}

if (isPlaying && currentPlayer === 'player1') {
  // Player 1's turn
}
This code has three sins:
Hard to read: To understand the current state, you have to flip through the whole file looking for boolean variables. isPlaying, isPaused, isGameOver—these variables are scattered like puzzle pieces; you have to assemble the full picture yourself.
Hard to change: Add a new “pause” state? You’ll need to modify if statements in a dozen places. Miss one, and here comes a bug. Once I added a “spectate” state—spent two days changing code, and still had issues on launch—some animation didn’t pause.
Hard to debug: State transition order is messed up, and you have no idea where the problem is. isGameOver became true, but hasShownResult is still false—which判断 was missed?
That Sohu article mentioned: 80% of card game bugs come from poor state design. That number sounds scary, but anyone who’s been through it knows—it’s real.
How Do State Machines Solve These Problems?
State machines consolidate scattered judgments into one place.
Each state has its own behavior: what to do on entry, what to do while running, what to do on exit. State transition rules are clearly written: from home you can only jump to battle, not directly to settlement.
See the comparison:
// State machine approach
class HomeState {
  enter() { showHomeUI(); }
  exit() { hideHomeUI(); }
  handleEvent(event) {
    if (event === 'START_BATTLE') {
      manager.changeState(new BattleState());
    }
  }
}

class BattleState {
  enter() { showBattleUI(); startBattle(); }
  exit() { hideBattleUI(); cleanupBattle(); }
}
States are encapsulated. Changing HomeState logic won’t affect BattleState. Adding a new state just requires writing a new State class and adding one transition rule.
That Better Programming article said: nested state machines have become the mainstream design pattern for complex games. Mini-games are no exception—clear states mean clear code.
Three-Layer State Machine Architecture Explained
Mini-game state machines should be designed in layers. Without layers, battle logic stuffed into the game flow layer will make code increasingly bloated.
I split the state machine into three layers: game flow layer, battle flow layer, and battle detail layer.
Layer 1: Game Flow Layer
This is the game’s main skeleton, the big flow from startup to settlement:
BootState: When the game launches, load resources, initialize engine. Cocos Creator’s Boot scene does exactly this—run Boot first, then switch to Home.
HomeState: Home menu. Players select levels, choose characters, view leaderboards. Logic here is relatively simple: show UI, handle button clicks.
BattleState: Battle scene. This layer isn’t the end point, but a container—inside battle there’s a sub-state machine.
SettlementState: Settlement interface. Display win/loss, stats data, cleanup battle resources.
The flow goes like this: Boot → Home → Battle → Settlement → back to Home (or exit).
Let me sketch the code:
Game Launch → BootState
              ↓ (loading complete)
             HomeState
              ↓ (click start)
             BattleState ← Battle sub-state machine here
              ↓ (battle ends)
          SettlementState
              ↓ (click return)
             HomeState
Layer 2: Battle Flow Layer
Inside BattleState, there’s another set of sub-state machines. That Better Programming article mentioned: Battle State can contain BeginBattle, HeroTurn, EnemyTurn, EndBattle as four sub-states.
BeginBattleState: Initialize battle. Set level parameters, load character data, sync all player states. In multiplayer, this phase needs locking—prevent players from joining or leaving mid-way.
PlayerTurnState: Player’s turn. Play cards, attack, defend—these operations are all handled in this state. Turn ends, switch to next turn or settlement.
EnemyTurnState (optional): AI actions. Single-player mini-games can skip this; multiplayer is opponent’s turn.
EndBattleState: Settlement logic. Determine win/loss, calculate rewards, trigger settlement animations.
Flow:
Enter BattleState → BeginBattleState (lock, sync)
                    ↓ (preparation complete)
                PlayerTurnState
                    ↓ (turn ends)
                EnemyTurnState (optional)
                    ↓ (battle ends)
                EndBattleState
                    ↓ (settlement complete)
         Exit BattleState → SettlementState
Layer 3: Battle Detail Layer
Some states need further subdivision. For example, PlayerTurnState can internally have:
Animation State Machine: Character plays attack animation when attacking, hurt animation when damaged. Both Unity and Cocos Creator have built-in animation state machines, so I won’t expand on that here.
Turn State Machine: Play card → Attack → Defend → End turn. Each action is a sub-state.
That Beast Card Clash game encapsulates setup, scoring, and results screen as independent state classes. The benefit: changing one phase’s logic doesn’t affect other phases.
The three-layer architecture’s benefit is clear separation of responsibilities. Changing home logic won’t break battle logic. Changing turn details won’t affect settlement flow. Team collaboration is easier too—one person handles battle flow layer, another handles detail layer.
State Machine Core Interface Design
Now that we’ve covered the three-layer architecture, let’s see how to write the code.
That Zhihu Unity article mentioned: the unified interface for state machine nodes is OnEnter, OnUpdate, OnExit, OnHandleEvent. I referenced this design and wrote a set in TypeScript.
IGameState Interface
Every state must implement this interface:
interface IGameState {
  name: string;                    // State name, convenient for debugging

  enter(params?: any): void;       // Initialize on state entry
  update(dt: number): void;        // Frame update (optional)
  exit(): void;                    // Cleanup on state exit
  handleEvent(event: GameEvent): void;  // Handle events, trigger state transitions
}
Five methods’ purposes:
name: For debugging. When outputting logs, you can see if the current state is “HomeState” or “BattleState”—more intuitive than looking at boolean variables.
enter: Called when entering a state. HomeState’s enter shows home UI, loads player data. BattleState’s enter initializes battle parameters, enters battle sub-state machine.
update: Frame-by-frame updates. Used heavily in battle scenes—refresh countdowns, detect player operations. Rarely used on home screen.
exit: Cleanup when exiting a state. Release resources, hide UI, cancel listeners.
handleEvent: Event-driven transitions. Clicking “start game” triggers START_BATTLE event, HomeState handles this event, switches to BattleState.
GameStateManager State Manager
A state machine needs a manager to switch states. That Stack Exchange article mentioned the CGameEngine class design: Init, Cleanup, ChangeState, PushState, PopState.
I simplified it:
class GameStateManager {
  private currentState: IGameState | null = null;
  private stateStack: IGameState[] = [];  // Support stacked states (pause overlay on battle)

  // Initialize
  init(firstState: IGameState) {
    this.currentState = firstState;
    this.currentState.enter();
  }

  // Switch state
  changeState(newState: IGameState, params?: any) {
    if (this.currentState) {
      this.currentState.exit();
    }
    this.currentState = newState;
    this.currentState.enter(params);
  }

  // Push stacked state (for pause, popups)
  pushState(state: IGameState) {
    if (this.currentState) {
      // Current state doesn't exit, just pauses
      this.stateStack.push(this.currentState);
    }
    this.currentState = state;
    state.enter();
  }

  // Pop stacked state
  popState() {
    if (this.currentState) {
      this.currentState.exit();
    }
    this.currentState = this.stateStack.pop();
    // No need to re-enter, just paused before
  }

  // Frame update
  update(dt: number) {
    if (this.currentState) {
      this.currentState.update(dt);
    }
  }

  // Handle event
  handleEvent(event: GameEvent) {
    if (this.currentState) {
      this.currentState.handleEvent(event);
    }
  }
}changeState: Switch states. Old state exits, new state enters. Home to battle uses this.
pushState / popState: Stacked states. During battle, press pause, PauseState pushes onto stack covering BattleState. Cancel pause, PauseState pops, BattleState resumes.
Stacked states are important. Pause, popups, confirmation dialogs—all need to overlay the current state without destroying it.
Real-World Pitfalls and Solutions
Theory is done, let’s talk about real pitfalls. That Sohu article summarized card game pitfall experiences—I’ll expand on a few classic problems.
State Drift: Server and Client States Inconsistent
Multiplayer games are most prone to this pitfall.
Scenario: Server switched to settlement state, but one player’s client is still in battle animation—network delay, didn’t receive state switch broadcast. Interface shows “in battle,” but it’s actually over.
Cause: State switch message was lost, or delayed too long.
Solution:
-
State synchronization mechanism: When server switches states, broadcast to all clients. Client immediately synchronizes upon receiving the message.
-
Heartbeat detection: Client sends heartbeat to server every few seconds, including current state. Server detects state inconsistency, forces push of sync message.
// Client heartbeat
class BattleState {
  enter() {
    this.startHeartbeat();
  }

  startHeartbeat() {
    setInterval(() => {
      socket.send({
        type: 'HEARTBEAT',
        state: this.manager.currentState.name,
        roomId: this.roomId
      });
    }, 3000);  // Send every 3 seconds
  }
}
Concurrency Conflict: Multiple Players Operating Simultaneously
At the card table, two players play cards at the same time, state switch order gets messed up.
Cause: No state lock, concurrent operations not queued.
Solution: State lock + “current operator ID” mechanism.
class DealingState implements IGameState {
  private lock: boolean = true;
  private currentOperator: string = '';

  enter() {
    this.lock = true;  // Lock during dealing phase
    // Prevent players from joining or leaving
    // Sync everyone's initial data

    setTimeout(() => this.unlock(), 3000);  // Unlock after 3 seconds
  }

  unlock() {
    this.lock = false;
    this.currentOperator = this.getFirstPlayerId();
    this.manager.changeState(new PlayerTurnState());
  }

  handleEvent(event: GameEvent) {
    if (this.lock) {
      // Locked state, reject operation
      return;
    }

    // Only current operator can trigger events
    if (event.playerId === this.currentOperator) {
      // Handle operation
    }
  }
}
The benefit of locking: critical moments (dealing, settlement) only one process runs, won’t be interrupted by player operations.
Settlement Security: Cracked Client Uploading Fake Scores
Client uploads settlement data: score, win/loss. Cracked client modifies the score—how does the server know what’s real?
Cause: Server trusts client data.
Solution: Server calculates independently, doesn’t trust client results.
// Server settlement logic
class EndBattleState {
  enter() {
    // Don't accept client-uploaded scores
    // Server independently calculates from battle log
    const result = this.calculateResultFromLog(battleLog);

    // Send result to all clients
    this.broadcastResult(result);
  }

  calculateResultFromLog(log: BattleLog) {
    // Independently calculate based on battle log (card play order, attack data)
    // Client logs can be faked; key data needs server validation
  }
}
Core principle: Server doesn’t trust client. Client only displays; server makes judgments.
Timeout Deadlock: State Has No Exit Condition
A certain state gets stuck, never switches to the next state.
Cause: State has no timeout mechanism, waiting for event that never triggers.
Solution: Set timeout timers for each state.
class PlayerTurnState implements IGameState {
  private timeoutTimer: number;

  enter() {
    this.timeoutTimer = setTimeout(() => {
      // Timeout auto-skip
      this.manager.handleEvent({
        type: 'TIMEOUT_SKIP',
        playerId: this.currentPlayer
      });
    }, 30000);  // 30 second timeout
  }

  exit() {
    clearTimeout(this.timeoutTimer);  // Clear timeout on exit
  }
}
Timeout mechanism is important. Player disconnects, network freezes—state can’t wait forever, needs a fallback plan.
That covers four pitfall points. These experiences matter more than theory—I stepped in the state drift pit and spent two days debugging before finding the cause. Later added heartbeat detection, problem gone.
Cocos Creator Practical Example
Theory, interfaces, pitfall experiences—now let’s see how to implement in Cocos Creator.
The previous article “Cocos Creator Mini-Game Project Structure” discussed how to split Boot, scenes, and settlement pages. This article continues that approach: how state machines combine with Layers.
State Machine in Single-Scene Architecture
Cocos Creator mini-games recommend single scene + multiple Layers. One scene, multiple Layers showing and hiding. State machine fits this architecture perfectly.
BootLayer → HomeLayer → BattleLayer → SettlementLayer
Each Layer corresponds to one state:
import { director, Node } from 'cc';

// HomeState
class HomeState implements IGameState {
  name = 'Home';
  private homeLayer: Node | null = null;

  enter() {
    // Show HomeLayer
    const scene = director.getScene();
    this.homeLayer = scene?.getChildByName('HomeLayer') ?? null;
    if (this.homeLayer) {
      this.homeLayer.active = true;
      this.initHomeUI();
    }
  }

  exit() {
    // Hide HomeLayer
    if (this.homeLayer) {
      this.homeLayer.active = false;
      this.cleanupHome();
    }
  }

  handleEvent(event: GameEvent) {
    if (event.type === 'START_BATTLE') {
      // Switch to BattleState
      this.manager.changeState(new BattleState(), event.params);
    }
  }

  initHomeUI() {
    // Load player data, set button click events
  }

  cleanupHome() {
    // Release home resources
  }
}

// BattleState
class BattleState implements IGameState {
  name = 'Battle';
  private battleLayer: Node | null = null;

  enter(params?: any) {
    const scene = director.getScene();
    this.battleLayer = scene?.getChildByName('BattleLayer') ?? null;
    if (this.battleLayer) {
      this.battleLayer.active = true;
      this.startBattle(params);
    }
  }

  exit() {
    if (this.battleLayer) {
      this.battleLayer.active = false;
      this.cleanupBattle();
    }
  }

  startBattle(params: any) {
    // Enter battle sub-state machine
    this.battleStateManager.init(new BeginBattleState(params));
  }

  cleanupBattle() {
    // Cleanup battle resources
  }
}
Layer showing and hiding is the visual representation of state transitions. enter shows, exit hides.
State Machine and Data Passing
Pass parameters when switching states. For example, player selected a level on home screen, BattleState needs to know which level:
// HomeState initiates transition
handleEvent(event: GameEvent) {
  if (event.type === 'START_BATTLE') {
    // Pass level parameters
    this.manager.changeState(new BattleState(), {
      levelId: event.levelId,
      difficulty: event.difficulty
    });
  }
}

// BattleState receives parameters
enter(params?: any) {
  const levelId = params?.levelId ?? 'default';
  const difficulty = params?.difficulty ?? 'normal';
  this.loadLevel(levelId, difficulty);
}
Use localStorage for state persistence. Exit mid-battle, restore progress next time:
// Save progress
exit() {
  localStorage.setItem('battle_progress', JSON.stringify({
    levelId: this.levelId,
    round: this.currentRound,
    score: this.score
  }));
}

// Restore progress
enter() {
  const saved = localStorage.getItem('battle_progress');
  if (saved) {
    const progress = JSON.parse(saved);
    this.resumeFromProgress(progress);
  }
}
WeChat Mini-Game Considerations
That CSDN article mentioned: WeChat mini-game state machines placed in global files are easier to modify.
Package size limit: WeChat mini-game main package is 4MB. State machine code should be concise, can’t have too many classes.
Subpackage loading: Core state machine in main package (Boot, Home, Battle), extended states in subpackages (special levels, event screens).
Global state file: Initialize state machine in WeChat mini-game entry file game.js, other modules access via global variable.
// game.js
import { GameStateManager } from './states/GameStateManager';
import { BootState } from './states/BootState';

// Global state manager
window.gameStateManager = new GameStateManager();
window.gameStateManager.init(new BootState());
When calling WeChat API, get state via global variable:
// WeChat login callback
wx.login({
  success: (res) => {
    const state = window.gameStateManager.currentState;
    if (state.name === 'HomeState') {
      state.handleEvent({ type: 'LOGIN_SUCCESS', code: res.code });
    }
  }
});
The benefit of this architecture: WeChat API doesn’t need to import the state machine, just access via global variable.
Read this article together with the previous one “Cocos Creator Mini-Game Project Structure” for a more complete understanding. Project structure is the state machine’s container; state machine is the project structure’s behavioral logic.
Summary
After all this, state machines are really just breaking game flows into clear nodes.
Three-layer architecture—game flow layer, battle flow layer, battle detail layer—works for mini-games to large projects. The benefit of three layers is changing one layer doesn’t affect others, and team collaboration is easier.
Pitfall experiences matter more than theory. State drift, concurrency conflicts, settlement security, timeout deadlocks—I’ve stepped in all four pits, and debugging was painful. Later added state locks, heartbeat detection, server validation, timeout mechanisms—problems gone. Write code right, bugs decrease significantly.
If you want to try it hands-on, you can download the complete code example (GitHub link). First read the previous article “Cocos Creator Mini-Game Project Structure” to understand how Layers split, then read this one to understand how state machines run. Read both together, and the architecture becomes clear.
Next step I’ll talk about AI-assisted state machine testing—letting AI generate test cases to cover various state transition paths. With automated testing, pitfall probability goes down even more.
Design a Mini-Game Three-Layer State Machine Architecture
Complete state management implementation flow from home to battle to settlement
⏱️ Estimated time: 60 min
- 1
Step 1: Define game flow layer states
List main game flow states: BootState, HomeState, BattleState, SettlementState. Each state corresponds to one Layer or scene; define state transition rules. - 2
Step 2: Split battle flow layer sub-states
Build sub-state machine inside BattleState: BeginBattleState (initialization with lock), PlayerTurnState (player turn), EnemyTurnState (optional AI turn), EndBattleState (settlement judgment). - 3
Step 3: Implement state interfaces and manager
Create IGameState interface (name, enter, exit, update, handleEvent), implement GameStateManager to manage state transitions (changeState) and stack operations (pushState, popState). - 4
Step 4: Add pitfall protection mechanisms
Add locks at critical states (dealing, settlement) to prevent concurrency conflicts, set timeouts to avoid deadlocks, implement heartbeat detection for state drift, server independent calculation to prevent settlement cheating. - 5
Step 5: Integrate with Cocos Creator Layers
Show corresponding Layer in enter and initialize data; hide Layer and cleanup resources in exit. State machine drives UI transitions, decoupling code logic from visual presentation.
FAQ
Do mini-games really need state machines?
Is a three-layer state machine over-engineering?
What's the difference between state machines and scene switching?
How to solve state drift in multiplayer games?
How to prevent cheating in settlement data?
13 min read · Published on: May 19, 2026 · Modified on: Jul 14, 2026
AI-Assisted Cocos Mini Game Development
If you landed here from search, the fastest way to build context is to jump to the previous or next post in this same series.
Previous
Cocos Creator Mini-Game Project Structure: How to Split Boot, Scenes, and Settlement Pages
A detailed guide to Cocos Creator mini-game project structure best practices: single-scene architecture with four-layer switching, complete breakdown of Boot startup page, main scene, and settlement page with code examples.
Part 3 of 21
Next
Turn Your Game Idea into PRD and Task List with AI
Learn how to use AI to transform your game idea into a complete PRD and development task list in 30 minutes. Includes Prompt templates, game-specific PRD structure, and real-world examples. Perfect for indie developers and small teams.
Part 5 of 21


Comments
Sign in with GitHub to leave a comment