
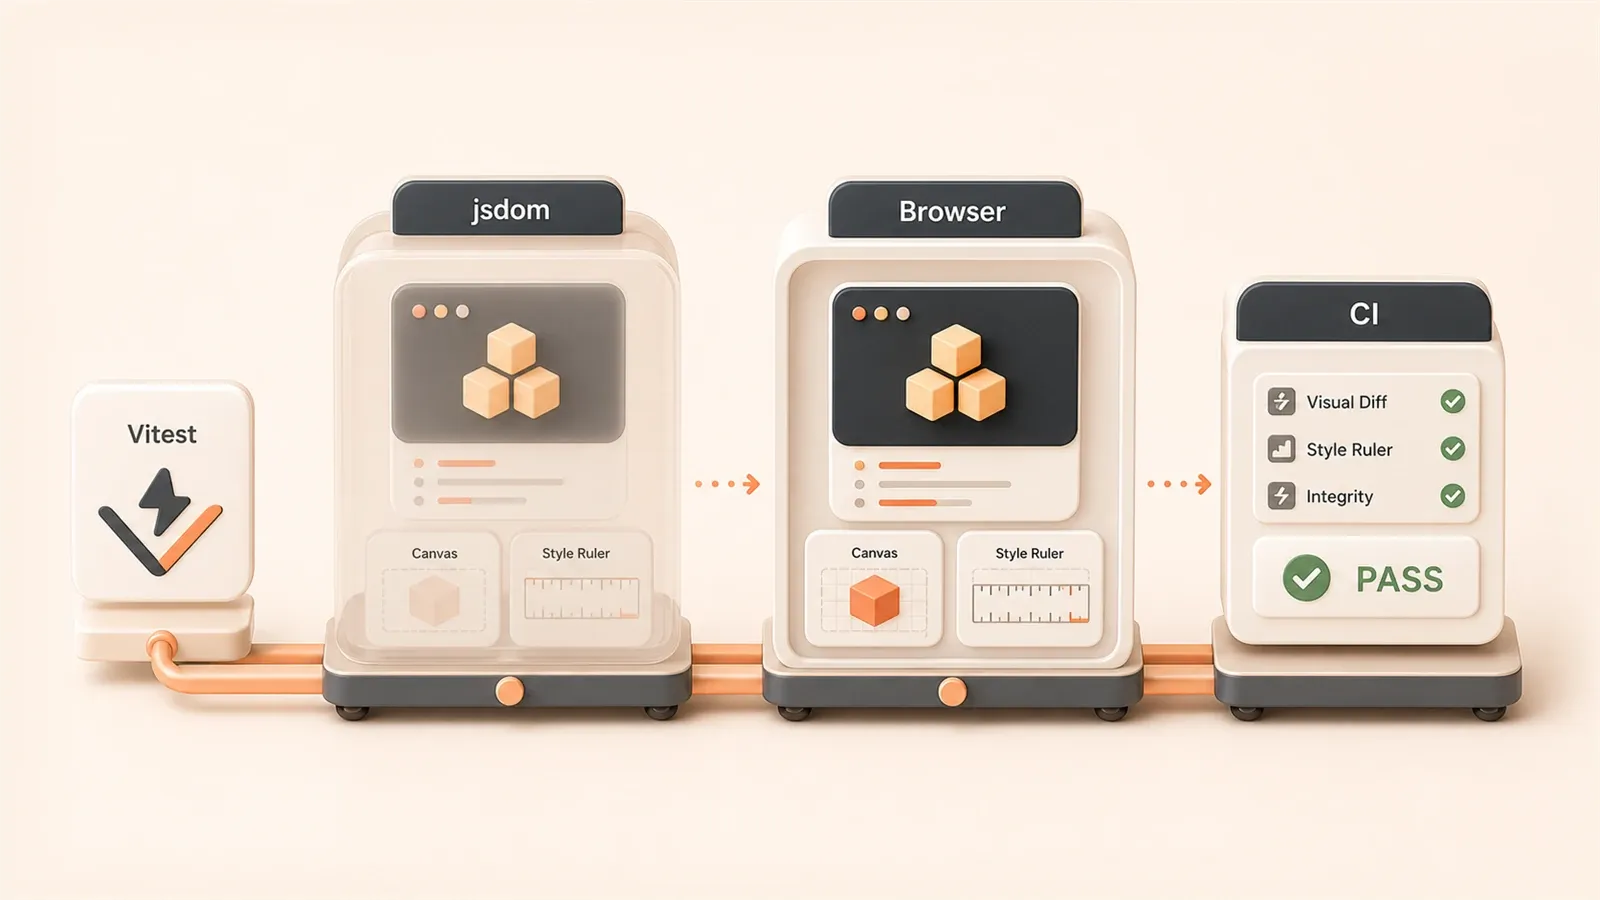
Vitest Component Testing in Practice: Browser Mode and Playwright Integration
The first time I tested a Canvas component I trusted the green PASS and shipped.
Next day in a real browser the Canvas never rendered. jsdom is not a browser—it fakes DOM APIs, not painting, real CSS, or Web Components lifecycles.
Vitest 3.0 Browser Mode runs tests in Chromium/Firefox/Safari with Playwright. Green means it actually rendered.
This article configures Browser Mode for React/Vue, CI coverage gates, and completes the Vitest series after unit setup and TDD.
Why Do You Need Browser Mode?
You might wonder: isn’t jsdom enough?
Honestly, for pure logic components—like a calculator or form validator—jsdom is perfectly fine. It’s a DOM simulator in Node.js, blazing fast and simple to configure. The unit tests in my previous articles all ran in jsdom, testing reactive data and event triggers without issues.
But jsdom falls short in these scenarios:
- Canvas Drawing: jsdom has Canvas APIs, but doesn’t actually render anything. You can test that
ctx.fillRect()was called, but can you test if the drawn shape is correct? Nope. - Computed CSS Styles:
getComputedStyle()returns empty objects in jsdom. In real browsers, element width is affected by parent containers, padding, borders—jsdom can’t calculate any of that. - Web Components: Custom elements’
connectedCallbackanddisconnectedCallbackexist in jsdom, but lifecycle timing differs from real browsers. - Async Rendering: Animation frames, requestIdleCallback, IntersectionObserver—these APIs are either missing or incompletely implemented in jsdom.
Here’s a trap I fell into. Last year, a project had a component using CSS animations for button expand/collapse. In jsdom tests, transitionend events never fired—because there’s no real transition. Tests mocked the event, but then the animation duration changed in the real browser. Tests still “passed,” but the component was broken.
Browser Mode solves these problems. It renders components in real browsers. You write test code, it launches Chromium (or Firefox/Safari), mounts the component to the page, and uses Playwright’s API to click, type, and wait. What happens in the real browser is what gets tested.
Here’s a notable stat: Vitest 3.0’s Browser Mode shares Chromium contexts, launching the browser only once with all tests sharing the same instance. The official docs say it’s 30% faster than traditional Playwright E2E. Testing 50 components? No waiting for browser restarts.
There’s also debate about the testing pyramid for component testing. The traditional pyramid: unit tests at the base, E2E at the top. But Vue’s official blog has a counter-argument—alexop.dev’s inverted testing pyramid: 70% integration tests, 20% unit tests, 10% E2E. The reasoning: components themselves are integration units, combining templates, styles, and logic. jsdom unit tests only cover logic; integration tests verify overall behavior. Browser Mode fills this gap—more realistic than jsdom, lighter than Playwright E2E.
Browser Mode Configuration in Practice
Configuring Browser Mode isn’t actually that complex. But there are a few gotchas I’ve hit—let me share them upfront.
Installing Dependencies
First, install Vitest and the Browser Mode provider. Playwright is the official recommendation:
npm install -D vitest @vitest/browser-playwrightPlaywright installs Chromium, Firefox, and WebKit browsers. If you only want Chromium (sufficient for most cases), specify during installation:
npx playwright install chromiumThis step is a bit slow—Chromium is about 170MB. Once downloaded, you’re basically ready.
vitest.config.ts Configuration
The config file is simple, but watch for one detail:
import { defineConfig } from 'vitest/config'
import { playwright } from '@vitest/browser-playwright'

export default defineConfig({
  test: {
    browser: {
      provider: playwright(),
      enabled: true,
      instances: [{ browser: 'chromium' }],
    },
  },
})
The instances configuration determines which browser runs your tests. For cross-browser compatibility testing, add Firefox and WebKit:
instances: [
  { browser: 'chromium' },
  { browser: 'firefox' },
  { browser: 'webkit' },  // Safari
]
I usually stick with Chromium—multi-browser testing is slow, and most frontend bugs are caught in Chromium. Safari compatibility issues, I cover with Playwright E2E on critical paths.
Headless Mode vs UI Mode
This choice is subtle.
- Headless Mode: Browser runs without a window, tests execute in the background. Good for CI environments, fast, but you can’t see the rendering process.
- UI Mode: Browser opens a window, you can see components render, get clicked, accept input. Great for debugging during development, very useful when writing tests.
I use UI Mode during development, running:
npx vitest --browser.uiVitest opens a test workbench—test list on the left, browser window on the right. Click a test file, the browser renders the component, and you can watch the test code execute. Button not responding? Debug directly in the browser.
For CI environments, use Headless Mode with one config line:
browser: {
  provider: playwright(),
  enabled: true,
  headless: true,  // Force headless in CI
  instances: [{ browser: 'chromium' }],
}
Test File Naming Convention
The official recommendation is using .browser.test.ts for Browser Mode test files, distinguishing them from regular .test.ts files. Benefits I’ve found:
- You can run jsdom unit tests and Browser Mode component tests simultaneously without mixing them.
- When CI mysteriously fails, the filename tells you it’s a browser test—clear troubleshooting direction.
Vitest doesn’t enforce this naming. .test.ts works too. The key is specifying which directory contains Browser Mode tests in your config, or just run all tests in Browser Mode. I prefer separating them—jsdom for unit tests, Browser Mode for component tests.
React/Vue Component Testing in Practice
This is the core use case for Browser Mode. Honestly, the syntax differs a bit from traditional Testing Library, but it’s intuitive once you get used to it.
React Component Testing
First, install the React adapter:
npm install -D @vitest/browser-reactThen write tests. Say you have a Counter component where clicking a button increments the count:
// Counter.browser.test.ts
import { page } from '@vitest/browser/context'
import { userEvent } from '@vitest/browser/context'
import Counter from './Counter'

test('button click increments count', async () => {
  // Render component to browser
  await page.mount(<Counter />)

  // Find button element
  const button = page.getByRole('button', { name: 'Count: 0' })

  // Click button
  await userEvent.click(button)

  // Verify text change
  await expect.element(button).toHaveTextContent('Count: 1')
})
Compare with Testing Library syntax: Testing Library uses render(), Browser Mode uses page.mount(). Testing Library uses screen.getByRole(), Browser Mode uses page.getByRole(). The API is similar, just that page is Vitest Browser Mode’s context object.
One detail: await expect.element(button). This is Vitest’s Web Testing API—it automatically waits for element state changes. No manual await waitFor() needed; the test framework handles async waiting for you. Cleaner than Testing Library.
Vue Component Testing
Vue syntax is similar, but needs the Vue adapter:
npm install -D @vitest/browser-vueTesting a Vue Counter component:
// Counter.browser.test.ts
import { page } from '@vitest/browser/context'
import { userEvent } from '@vitest/browser/context'
import Counter from './Counter.vue'

test('button click increments count', async () => {
  // Render Vue component
  await page.mount(Counter)

  // Find button, click, verify
  const button = page.getByRole('button', { name: 'Count: 0' })
  await userEvent.click(button)
  await expect.element(button).toHaveTextContent('Count: 1')
})
Vue 2 uses @vue/test-utils syntax, which Browser Mode doesn’t directly support. But for Vue 3 projects, @vitest/browser-vue is sufficient.
A Real-World Example
In my project, I had a drag-and-drop sorting component using the HTML5 Drag & Drop API. In jsdom, dragstart and drop events can’t be simulated—you have to mock them, testing only “event was fired,” but is the sorting logic correct? Unknown.
With Browser Mode, the test is straightforward:
test('drag and drop sorting', async () => {
  await page.mount(<SortableList items={['A', 'B', 'C']} />)

  const itemA = page.getByText('A')
  const itemC = page.getByText('C')

  // Drag A after C
  await userEvent.dragTo(itemA, itemC)

  // Verify order change
  const items = page.getByRole('listitem')
  await expect.element(items.nth(2)).toHaveTextContent('A')
})
In a real browser, Drag & Drop API actually fires, sorting logic actually executes, element order actually changes. Test passed? Then it really works.
That’s the value of Browser Mode—it tests real behavior, not simulated behavior.
Playwright vs Browser Mode Selection Guide
You might be confused: Browser Mode and Playwright, aren’t they both browser testing? What’s the difference?
Simply put: Browser Mode tests components, Playwright tests flows.
Core Differences
| Feature | Browser Mode | Playwright |
|---|---|---|
| Test Scope | Single component isolation | Multi-page flow testing |
| Execution Speed | ~200ms/test | 2-5s/test |
| Startup Cost | Shared browser instance | Independent startup per test |
| Configuration Complexity | Low, integrated in Vitest | High, separate project config |
| Use Cases | Rapid iteration during development | Critical path verification before release |
Browser Mode is positioned for component testing—it mounts components to the browser but tests only that component’s behavior. Playwright is for E2E—it opens your complete application, navigating, logging in, submitting forms, testing entire flows.
An analogy: Browser Mode is like a surgeon using a microscope to examine individual cells. Playwright is like a doctor doing a full body scan. Each has its purpose; neither replaces the other.
Combined Strategy
Here’s how I use them in real projects:
- Browser Mode: Test all UI components—buttons, forms, cards, modals. Write during development, commit with code. Tests are fast, feedback is instant.
- Playwright E2E: Test 3-5 critical paths—view homepage after login, view results after search, view order after submission. Run only before release or during daily CI builds.
Benefits of this combination:
- Browser Mode catches most UI bugs during development.
- Playwright catches cross-page integration bugs before release.
- Maintenance is manageable—50 component tests, 5 E2E tests, not so many tests that CI slows down.
When to Choose Which?
Simple criteria:
- Choose Browser Mode: You’re testing individual component UI behavior—clicks, inputs, rendering, styles. When component code changes, tests need instant feedback.
- Choose Playwright: You’re testing multi-page flows—login -> navigate -> operate -> verify. Or testing cross-system integration—frontend + backend API + database.
Example: Testing a date picker component—date range limits, disabled dates, format display—use Browser Mode. Testing user selecting a date on a booking page, submitting an order, navigating to payment page—use Playwright.
One more point: Browser Mode only tests frontend; Playwright can test full-stack. If your application has backend APIs, Playwright E2E can test frontend + backend integration. Browser Mode only tests frontend components; backend must be mocked.
CI Environment Coverage Gates
Coverage configuration is the final piece in CI environments. Honestly, I didn’t prioritize this either—until a code refactor dropped coverage from 80% to 60%, causing a production bug. Only then did I realize the importance of coverage gates.
Coverage Configuration
Add coverage thresholds to vitest.config.ts:
test: {
  coverage: {
    provider: 'v8',  // or 'istanbul'
    reporter: ['text', 'json', 'html'],
    thresholds: {
      lines: 80,
      functions: 80,
      branches: 75,
      statements: 80
    }
  }
}
What threshold should you set? My experience:
- New Projects: Start at 50%, gradually increase. Setting it too high initially creates pressure.
- Mature Projects: 80% is reasonable. Core modules can be higher—90% or 95%.
- Don’t Chase 100%: Edge branches, exception handling—some scenarios can’t be tested. Forcing tests wastes time.
Run coverage tests:
npx vitest run --coverageCoverage below threshold? Vitest reports an error, CI build fails. That’s the gate—code below threshold can’t merge to main.
GitHub Actions Integration
Add two steps to your CI workflow: run tests + report coverage.
# .github/workflows/test.yml
name: Test

on: [pull_request]

jobs:
  test:
    runs-on: ubuntu-latest
    steps:
      - uses: actions/checkout@v4
      - uses: actions/setup-node@v4
        with:
          node-version: 20

      - run: npm ci
      - run: npx playwright install chromium --with-deps

      - name: Run tests with coverage
        run: npx vitest run --coverage

      - name: Report coverage
        uses: davelosert/vitest-coverage-report-action@v2
        with:
          json-summary-path: './coverage/coverage-summary.json'
This Action automatically displays coverage changes in PR comments:
- Coverage change percentage (e.g., from 80% to 79%, shows -1%)
- Which files had coverage drops
- Which new code is uncovered
PR authors see it immediately: “Oh, my new code doesn’t have enough coverage, I need to add tests.”
CI Considerations
Browser Mode has a few gotchas in CI environments:
- Playwright Browser Installation: Add
--with-depsflag, otherwise Chromium won’t start. - Headless Mode: Force
headless: truein config—CI environments have no display. - Timeout Settings: Browser Mode tests are slower than jsdom. Increase CI timeout threshold—I set 30 seconds.
- Parallelism Control: Browser Mode shares browser instances. Don’t set parallel test count too high—I limit to
maxWorkers: 4.
My complete CI workflow configuration:
- name: Run browser tests
  run: npx vitest run --coverage --browser.headless
  env:
    CI: true
--browser.headless ensures the browser doesn’t open windows. CI: true environment variable lets Vitest automatically adjust some behaviors (like disabling color output).
Summary
After all this, the core message is simple: jsdom can’t test real browser behavior—Browser Mode can. Canvas, computed CSS styles, Web Components, drag-and-drop, animations—these scenarios require Browser Mode.
Configuration isn’t hard. Install @vitest/browser-playwright, modify a few lines in vitest.config.ts, and you’re running. React and Vue component testing APIs are similar to Testing Library—easy to learn.
But Browser Mode isn’t a silver bullet. It tests individual components; Playwright tests flows. Use them together: Browser Mode for all UI components during development, Playwright E2E for critical paths before release. This gives comprehensive test coverage without slowing down CI.
Coverage gates are the final piece. Set a threshold, and PRs below threshold can’t merge—preventing coverage from slowly degrading. Add coverage-report-action in GitHub Actions, and PR comments automatically show coverage changes—problems are visible at a glance.
If you haven’t tried Browser Mode yet, start with simple components. A button component, an input component—configure Browser Mode first, verify the setup works, then gradually expand to complex components. You’ll hit some bumps, but once you’ve worked through them and gotten comfortable writing tests, development efficiency really improves.
Configure Vitest Browser Mode for component testing
Set up Browser Mode from scratch, run React/Vue component tests, and integrate CI coverage gates
⏱️ Estimated time: 20 min
- 1
Step 1: Install Playwright provider
Run npm install -D vitest @vitest/browser-playwright to install dependencies, then execute npx playwright install chromium to download the browser. - 2
Step 2: Configure vitest.config.ts
Set provider: playwright(), enabled: true, and instances: [{ browser: 'chromium' }] in test.browser. Add headless: true for CI environments. - 3
Step 3: Write component tests
Use page.mount() to render components, page.getByRole() to query elements, userEvent.click() to simulate interactions, and expect.element() to assert results. - 4
Step 4: Configure coverage gates
Set threshold values in vitest.config.ts coverage.thresholds (e.g., lines: 80), and integrate vitest-coverage-report-action in GitHub Actions to display PR coverage changes.
FAQ
What's the difference between Browser Mode and jsdom?
How to choose between Browser Mode and Playwright E2E?
What coverage threshold should I set?
Does Browser Mode support Vue 2?
What should I note about Browser Mode in CI environments?
11 min read · Published on: May 17, 2026 · Modified on: Jul 14, 2026
Vitest Testing Guide
If you landed here from search, the fastest way to build context is to jump to the previous or next post in this same series.
Previous
Vitest Unit Testing in Practice: TDD Workflow and Coverage Reports
Vitest TDD tutorial: complete Red-Green-Refactor workflow demo, coverage report configuration with CI thresholds, vi.fn/vi.spy/vi.mock comparison, the go-to testing framework for frontend in 2026
Part 2 of 3
Next
This is the latest post in the series so far.


Comments
Sign in with GitHub to leave a comment