
Train Your Own LoRA with ComfyUI: Data, Captions, Training, and Validation
"kohya-ss/sd-scripts provides LoRA training scripts and documentation for Stable Diffusion, SDXL, SD3, FLUX.1, and other model families."
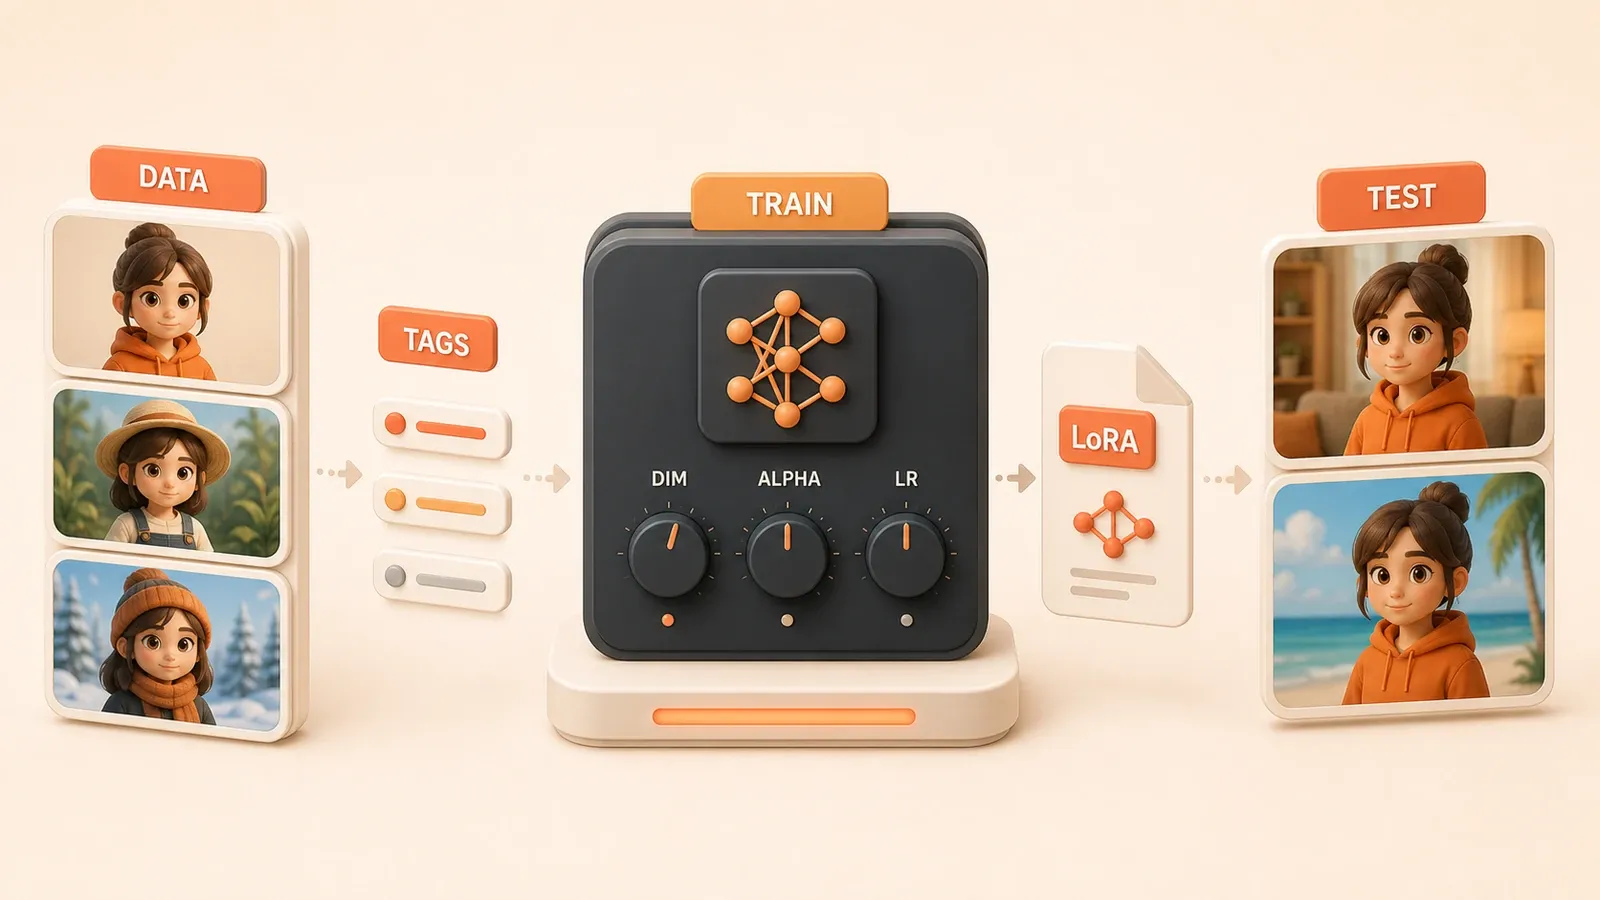
You have 20 original character images and want a LoRA that can reproduce the character in later generations.
The dataset is ready, the captioning tool is installed, and you copied parameters from a screenshot. The result still falls apart: the face changes with the background; captions include words such as “wall” and “floor,” so every scene inherits the same room; an LR of 1e-3 overfits and turns details into a mess; or you copy dim/alpha 32/1, leaving alpha=1 and dim=32 at a scale of only 0.03, about 3%.
There is no promise of succeeding in one run here. The practical route goes from dataset preparation and captions through initial parameters and fit diagnosis to validation in ComfyUI.
Dataset preparation: how many images and which ones
The first step in LoRA training is not opening a training tool. It is deciding whether the material is sufficient and suitable.
The training target determines the data volume
What you want to train directly determines how many images you need.
Character LoRA: start with 15–30 images. Excellent material that is clear, consistently sized, and cleanly framed can work with as few as 10. To preserve identity across scenes, include different backgrounds and angles.
Style LoRA: usually needs more, often 50–100 images, because a style includes more variables than one character: brushwork, palette, and composition habits. With too little data, the result may look vaguely similar but disappear on a new image.
Object or clothing LoRA: similar to a character, start with 15–30 images and make the main features clear through front, side, and close-up views.
Dataset quality checklist
The count alone is not enough. Weak material teaches the LoRA the backgrounds, lighting artifacts, and defects along with the intended subject.
| Training target | Starting count | Resolution | Background | Other requirements |
|---|---|---|---|---|
| Character LoRA | 15–30 images (10 can work at high quality) | Consistent size (512×512 or 1024×1024) | Clean or at least varied; avoid repeated scenes | Different angles, expressions, and poses |
| Style LoRA | 50–100 images | Match the base model (SD1.5→512, SDXL→1024) | Need not be clean, but the style must be consistent | Works from the same artist or series |
| Object LoRA | 15–30 images | Consistent resolution | Clean is preferable, though varied can work | Different views and detail close-ups |
The practical priority is consistent resolution, then background quality for characters, then varied angles and details. Large differences in source resolution produce inconsistent resizing and softer learned details.
Resolution, backgrounds, and preprocessing
Consistent resolution: training resizes every image to a target size. If sources vary from 512 to 2048 pixels, the resized detail level will vary. Crop them to the target resolution during preprocessing.
Background handling: background terms are a common character-LoRA trap. If 15 of 20 images show the same room, the captioner will repeatedly add “wall” and “floor,” and the LoRA may learn the room with the character. Choose clean backgrounds or review the captions manually, as described below.
Preprocessing flow:
- Select clear images with similar resolutions and obvious defining features.
- Crop them to one resolution with Photoshop, GIMP, or a batch script.
- Remove high-risk material when the same background appears in more than five images.
Captions and trigger words: how to label the dataset
Captioning is not a one-click batch job. Automatic tools include backgrounds and secondary traits, and those terms directly affect how usable the LoRA becomes.

Choosing a captioning tool
Common options include:
| Tool | Characteristics | Best for | ComfyUI support |
|---|---|---|---|
| WD14 Tagger | Common in the Stable Diffusion ecosystem; uses Danbooru-style tags and suits characters or anime | Character LoRAs and anime styles | Nodes are available through Image-Captioning-in-ComfyUI |
| Florence2 | A Microsoft vision model that writes natural-language descriptions | Realistic characters and objects | ComfyUI nodes are available |
| BLIP | An image-captioning model that produces natural-language output | Realistic styles and scenes | Supported in ComfyUI |
WD14 Tagger is common for character LoRAs, but it can insert background terms such as “simple background” and “white wall.” Florence2 is better suited to realistic material and produces prose rather than a tag list.
Trigger-word format and placement
Use a rare token or custom combination that is unlikely to collide with an existing model tag. Common forms include:
sks charname, wheresksis an older rare-token prefix used in Stable Diffusion workflowsxyz_character_name, with a custom prefixmy_char_001
Where to put it:
- Place the trigger at the start of each image’s
.txtor.captionfile, followed by attribute terms. - Some trainers expose a separate trigger field, but it is not required if every caption already includes the token.
Should the trigger be present? Yes. Without a repeated token, the model lacks a consistent name for the concept. Include it in every caption, then use it during generation to activate the LoRA.
Manually checking core attributes
After automatic captioning, check at least three things.
Background leakage: if “wall,” “floor,” or “bedroom” appears frequently in a character dataset, new backgrounds may fail. Delete those terms or replace them with a broader term such as “simple background.”
Missing triggers: confirm that every caption begins with the intended trigger.
Missing defining traits: if the character has a distinctive hairstyle, palette, or outfit that the captioner missed, add it manually.
This does not require proofreading every word. Use a text tool such as grep or a spreadsheet to inspect term frequency, then correct the anomalies.
Training-tool boundaries: what ComfyUI training actually does
ComfyUI can run LoRA training, but ComfyUI itself is not the training backend.
kohya-ss/sd-scripts is the training backend
The training work is performed by kohya-ss/sd-scripts, a widely used script collection for Stable Diffusion LoRA training. Tools such as Kohya GUI and ComfyUI training nodes wrap these scripts or closely related implementations.
ComfyUI-side nodes such as FluxTrainer and Lora-Training-in-Comfy are wrappers:
- FluxTrainer, maintained by Kijai, wraps modified sd-scripts training code and exposes FLUX and related training in a ComfyUI workflow.
- Lora-Training-in-Comfy similarly provides a ComfyUI interface around kohya-based training for supported Stable Diffusion families.
The boundary matters: a training node does not provide universally optimal parameters. Its defaults are examples or the author’s latest working settings, so consult the node’s current README and the upstream training documentation.
Comparing training paths
| Path | Advantages | Drawbacks | Best for |
|---|---|---|---|
| kohya-ss GUI desktop app | Full parameter UI and many community tutorials | Separate installation and a dense interface | Users who want complete parameter control |
| ComfyUI training nodes such as FluxTrainer | Runs inside ComfyUI and keeps the workflow together | Experimental pieces; defaults are not guaranteed to be optimal | Existing ComfyUI users who want training in the same graph |
| Raw kohya-ss scripts in the terminal | Current features and complete parameter control | Higher command-line barrier | Experienced trainers tuning specific settings |
Where to look for current parameters
Do not rely only on tutorial screenshots or node defaults. Start with the current kohya-ss/sd-scripts documentation:
- Training guides describe options for different model families, including SD1.5, SDXL, and FLUX.1.
- GitHub issues and discussions contain narrower experience reports, such as the network-alpha discussion.
Learning rates, dim/alpha, and step counts change with the base model and dataset. There is no single configuration that fits every LoRA.
Initial parameter recipes: what to set for each target
These recipes are reproducible starting points, not guaranteed optimal settings. Adjust them against saved epochs and fit symptoms.
The relationship between network dim and alpha
Network dim, or rank, controls the capacity of the LoRA weight matrices. A higher dim can represent more detail, but also increases memory and training cost.
Network alpha scales the learned LoRA weights. When alpha is below dim, the effective update is damped relative to the configured learning rate.
Simplified scale: alpha / dim

Examples:
- alpha=16, dim=32 → scale 16/32=0.5
- alpha=32, dim=32 → scale 1
- alpha=1, dim=32 → scale 1/32≈0.03
Copying dim=32 and alpha=1 without considering the learning rate and steps can therefore produce a weak result.
Starting guidance:
- Try alpha=dim for no scaling or alpha=dim/2 for moderate damping.
- When alpha is below dim, evaluate it together with a higher learning rate or more steps rather than changing one number in isolation.
Starting learning rates, steps, and epochs
| Parameter | Character LoRA start | Style LoRA start | Notes |
|---|---|---|---|
| Learning rate (U-Net LR) | 4e-4 | 1e-4 | Starting value; tune against fit symptoms and account for alpha scaling |
| Learning rate (text encoder LR) | 5e-5 or 1e-5 | 5e-5 or lower | Trigger learning is usually below the U-Net rate |
| Steps | 1000–2000 | 2000–3000 | Derive from epochs and stop early if overfitting appears |
| Epochs | 10–20 | 20–30 | A small 15–30-image character dataset may need fewer epochs |
Steps are optimizer updates; an epoch is one pass through the dataset. The actual relationship also depends on repeats, batch size, gradient accumulation, and distributed settings, so read the trainer’s reported step count rather than relying on a shortcut formula.
Choosing the base model
The base model determines LoRA compatibility:
| Base model | Training resolution | Compatible generation models | Approximate starting VRAM |
|---|---|---|---|
| SD1.5 | 512×512 | SD1.5 and compatible derivatives | About 8 GB with fp16 and gradient checkpointing |
| SDXL | 1024×1024 | SDXL and compatible derivatives | About 12 GB with fp16 and gradient checkpointing |
| FLUX.1 | 1024×1024 or higher | The corresponding FLUX.1 family | Often much higher without memory-saving options |
FLUX.1 support and memory-saving flags continue to change. Use the current trainer documentation rather than treating a fixed VRAM number as a promise.
Starting recipe table
| Training target | dim | alpha | U-Net LR | Text encoder LR | Initial steps/epochs | Base model |
|---|---|---|---|---|---|---|
| Character LoRA (SD1.5) | 32 or 128 | 32 or 1; compensate when alpha is low | 4e-4 | 5e-5 | 1000–2000 steps / 10–20 epochs | SD1.5 |
| Character LoRA (SDXL) | 128 | 1 or 128 | 4e-4 | 5e-5 | 1500–2500 steps / 10–20 epochs | SDXL |
| Style LoRA (SD1.5) | 128 or 256 | 128 or 1 | 1e-4 | 5e-5 or lower | 2000–3000 steps / 20–30 epochs | SD1.5 |
Treat every value as a starting point and adjust it using the fit checks in the next section.
Overfitting and underfitting: how to identify and fix them
Poor settings can overfit the LoRA until details collapse, or underfit it until the intended concept barely appears.
Symptoms of overfitting
Appearance:
- Details blur, merge, or distort.
- The LoRA only recognizes poses and scenes from the training set and fails on a new background or angle.
- Defects such as noise or watermarks from the dataset reappear.
Trigger response:
- The response is too strong to control; even a weight of 0.3 resembles the training data.
- Features appear without the trigger, suggesting the concept has become overly entangled.
Symptoms of underfitting
Appearance:
- The result does not resemble the target, and defining details are weak or missing.
- The trigger produces little or no response.
Background-change test:
- The target features remain weak regardless of the background, indicating that the main concept was not learned.
Overfitting versus underfitting
| Symptom | Overfitting | Underfitting | Fix direction |
|---|---|---|---|
| Visual details | Collapsed details; copies the training set | Weak resemblance and details | Overfit: lower LR or steps; underfit: raise LR or improve the data |
| Background test | Breaks when the scene changes | Target remains weak everywhere | Overfit: inspect background terms; underfit: check trigger coverage |
| Trigger response | Too strong and hard to control | Weak or absent | Overfit: lower LR or a very high dim; underfit: raise LR, improve data, or reconsider dim |
| Weight range | Still copies at 0.3 | Barely appears at 1.0 | Overfit: choose an earlier epoch; underfit: continue carefully or improve the dataset |
Priority order for fixes
For overfitting:
- Lower the learning rate, initially by a meaningful test step such as 50%.
- Reduce the total steps or select an earlier saved epoch.
- Inspect captions for repeated backgrounds and secondary traits.
- Lower dim if it is unnecessarily high.
For underfitting:
- Raise the learning rate in a controlled comparison.
- Add or improve data when coverage is weak.
- Confirm that the trigger appears in every caption.
- Raise dim if capacity is clearly too low.
VRAM requirements and low-memory paths: can an RTX 3060 train?
Limited VRAM does not always prevent training, but it forces tradeoffs in resolution, model family, speed, and optimization settings.
Approximate minimum VRAM
| Base model | Approximate baseline with fp16 and checkpointing | With additional savings | Relevant options |
|---|---|---|---|
| SD1.5 | About 8 GB | About 6 GB in constrained configurations | Lower dim, gradient checkpointing, optimizer and precision choices |
| SDXL | About 12 GB | Around 10 GB in some configurations | Lower dim, gradient checkpointing, block or optimizer savings |
| FLUX.1 | Often around 24 GB without savings | Can approach 10 GB in heavily optimized setups | Block swapping, checkpointing, lower dim, and quantization where supported |
The roughly 24 GB to 10 GB example comes from a 2025 third-party training guide. Actual use depends on the trainer, model, optimizer, cache settings, dataset, and GPU.
Memory-saving techniques
Fused or memory-efficient backward options: reduce peak memory in supported trainers, but the result varies by implementation.
Gradient checkpointing: trades compute time for memory by recomputing activations during backward passes.

Lower dim: a smaller rank reduces the number of LoRA parameters and usually lowers the memory footprint.
Mixed precision and quantization: fp16 or bf16 is common; some trainers also support FP8 or quantized components, with compatibility and quality tradeoffs.
Low-VRAM tradeoff table
| VRAM | Practical target | Tradeoff | Suggested path |
|---|---|---|---|
| 6 GB | SD1.5 character LoRA | Low dim, checkpointing, and slower runs | Start with SD1.5 and small batches |
| 8 GB | SD1.5 character or style LoRA | Lower dim and checkpointing | Use mature SD1.5 memory-saving options |
| 10 GB | Some SDXL character setups | Aggressive savings and slower training | Test SDXL only with a documented low-memory recipe |
| 12 GB+ | More SDXL setups; experimental FLUX.1 recipes | Savings may still be required | Prefer SDXL first; treat FLUX.1 as configuration-sensitive |
When VRAM is tight, start with SD1.5 rather than assuming an SDXL or FLUX.1 recipe will fit. Its training stack has lower requirements and more mature low-memory practices.
ComfyUI validation: how to test the finished LoRA
One generated image is not enough. Validate the trigger response, detail retention, background transfer, and controllable weight range systematically.
Loading the LoRA
Use ComfyUI’s Load LoRA node to load the trained .safetensors file:
- Node: Load LoRA, included with ComfyUI
- Parameters: LoRA file plus model and clip strengths; start near 0.5 and adjust from evidence
Building a prompt template
The validation prompt should contain the trigger and core attributes:
- Trigger word: place the trained token near the start, such as
sks charname. - Attribute terms: use important high-frequency features such as hair, palette, and clothing.
- Scene terms: replace the scene for the background test, for example “in a forest” or “at night.”
Example:
sks charname, blonde hair, blue eyes, white dress, simple backgroundBackground-change test:
sks charname, blonde hair, blue eyes, white dress, in a forest, at sunsetSweeping the weight range
Test several LoRA weights under identical conditions:
- weight=0.3: check whether the effect is subtle and controllable.
- weight=0.5: check whether the target is recognizable at a practical starting strength.
- weight=1.0: check full strength for distortion or loss of prompt control.
If 0.3 still looks locked to the training data, suspect overfitting. If 1.0 barely resembles the target, suspect underfitting or a trigger and compatibility problem.
Acceptance checklist
| Check | Passing result | If it fails |
|---|---|---|
| Trigger response | Clear traits at 0.5 and controllable influence at 0.3 | No response: inspect captions and trigger; excessive response: lower LR or choose an earlier epoch |
| Detail retention | Defining hair, palette, and clothing remain clear | Distorted details: overfit; faint details: underfit |
| Background transfer | The subject remains recognizable while only the scene changes | Failure on a new scene: inspect repeated background captions and dataset variety |
| Weight control | Traits change gradually from 0.3 to 1.0 | No useful range: revisit the training strength and saved epochs |
Next steps and related reading
For loading, weights, stacking, and trigger control, continue with Using LoRA in ComfyUI: Loading, Weights, Stacking, and Character Consistency.
Because the base model controls compatibility and shape mismatches, see Choosing Stable Diffusion Models: Base Model Compatibility for LoRA.
For repeatable validation prompts, use Stable Diffusion Prompt Templates for Testing LoRA Results.
Alternatives that do not require retraining:
- FLUX.1 Kontext can preserve a character without LoRA training when the dataset is too small or training is not worth the cost.
- InstantID and IPAdapter FaceID use reference images for face consistency instead of training a LoRA.
How to train and validate your own LoRA
Choose the target, prepare and caption the dataset, set initial training parameters, then test trigger response, detail retention, and background generalization in ComfyUI.
⏱️ Estimated time: 4 hr
- 1
Step 1: Choose the training target and base model
Decide whether you are training a character, style, or object, then select SD1.5, SDXL, or FLUX.1; the training base controls generation compatibility. - 2
Step 2: Select and normalize the dataset
Keep clear images with an obvious subject and varied angles and backgrounds, then crop them to a consistent resolution for the chosen base model. - 3
Step 3: Generate captions and review them
Use an appropriate captioning tool, then inspect frequent background terms, essential attributes, and the trigger word in every caption. - 4
Step 4: Set initial parameters
Choose dim, alpha, learning rates, and steps or epochs for the target, treating the tables as reproducible starting points rather than universal answers. - 5
Step 5: Save intermediate epochs
Save weights at fixed intervals so you can select the version that generalizes well without overfitting. - 6
Step 6: Validate under fixed conditions in ComfyUI
Keep the prompt, seed, sampler, and image size fixed while testing weights such as 0.3, 0.5, and 1.0 across different backgrounds. - 7
Step 7: Adjust from the symptoms
For overfitting, lower the learning rate or steps and inspect background tags; for underfitting, check the trigger, data volume, learning rate, and dim.
FAQ
How many images do I need to train a LoRA?
How should I set network dim and alpha?
What learning rate should I use for LoRA training?
How can I train a LoRA with limited VRAM?
Can I train a LoRA directly in ComfyUI?
How do SDXL and FLUX.1 LoRA training differ?
13 min read · Published on: Aug 28, 2026 · Modified on: Aug 28, 2026

ComfyUI & Stable Diffusion: Setup, Models, and Workflows
If you landed here from search, the fastest way to build context is to jump to the previous or next post in this same series.
Previous
ComfyUI Face Consistency: InstantID vs FaceID vs ReActor
Compare InstantID, IPAdapter FaceID, and ReActor by workflow stage and model setup, with reference checks, tuning, troubleshooting, and licensing limits.
Part 9 of 16
Next
ComfyUI Regional Prompting for Multi-Subject Compositions: Regional, Cutoff, and Conditioning Combine
Separate ComfyUI subjects with Set Area, RegionalPrompt, and Cutoff, covering coordinates, mask sampling, ControlNet pairing, strength, and second-pass color bleed.
Part 11 of 16


Comments
Sign in with GitHub to leave a comment