OpenAI Blocked in China? Set Up Workers Proxy for Free in 5 Minutes (Complete Code Included)

Introduction
Last week, I wanted to build a ChatGPT application for fun. After finishing the frontend code, I excitedly called the API, only to get a connection timeout. Tried several times with no luck, then realized—OpenAI is completely blocked in China.
To be honest, being blocked by the network feels really frustrating. I tried proxy services from Taobao but worried they weren’t reliable—what if my API Key got leaked? I also considered buying a VPS to set up my own proxy, but the cost was at least several dozen dollars a month, plus the hassle of server configuration and maintenance. Just thinking about it gave me a headache.
Then I discovered Cloudflare Workers. Completely free and takes only 5 minutes to set up. I’ve been using it for over two months now, and it’s amazing—not only stable but often faster than many paid proxies. This article shares the complete setup process with ready-to-use code.
Why Choose Cloudflare Workers?
Zero Cost, Perfect for Individual Developers
The Workers free plan gives you 100K requests per day and 1,000 requests per minute. You might wonder—can free be any good? I thought the same initially. But after using it, I found that for personal development, learning, or small projects, this quota is more than enough.
Let’s do the math: Assuming each request takes 2 seconds on average, working 8 hours straight non-stop, that’s about 2,000+ requests. With a 100K quota, you’d need to use it continuously for several days to run out.
No Server Needed, Hassle-Free
Traditional solutions require buying a VPS, installing Nginx for reverse proxy, and worrying about server downtime. Workers needs none of that—Cloudflare handles all the infrastructure. You just write a few lines of code.
Plus, Workers runs on Cloudflare’s global CDN network, theoretically faster than your self-hosted single server. After all, Cloudflare has nodes in over 300 cities worldwide.
Built-in API Key Protection
This is particularly important. If you call OpenAI API directly from the frontend, your key will definitely be exposed in the browser—anyone opening developer tools can see it. With Workers as a middleware, the frontend only calls your Worker URL, while the actual API Key stays safely in Cloudflare’s environment variables.
2025 New Benefits
By the way, in August 2025, Cloudflare partnered with OpenAI to integrate OpenAI’s open-source models directly into Workers AI. This means besides proxying the original API, you can also directly use Cloudflare’s provided models with 10,000 Neurons of free daily quota.
Preparation
The preparation is super simple. You need:
Accounts and Resources:
- Cloudflare account (free registration, takes a few minutes)
- OpenAI or Claude API Key (you should already have this)
- Domain (optional, Workers provides a free .workers.dev subdomain)
Technical Requirements:
- Basic JavaScript knowledge (just need to understand fetch requests)
- Understanding of HTTP
Time Cost:
- First-time setup: 5-10 minutes
- Once familiar: 3 minutes
Hands-on: Set Up OpenAI Proxy in 5 Minutes
Step 1: Create a Worker
Log into Cloudflare console, find “Workers & Pages” in the left menu. Click “Create Application,” then select “Create Worker.”
Cloudflare will automatically give your Worker a random name (like aged-shadow-1234). You can change it to something like “openai-proxy.” Click “Deploy.”
Now you have a running Worker, though it doesn’t do anything yet.
Step 2: Write the Code
Click “Edit Code” to enter the code editor and paste this code:
export default {
  async fetch(request, env) {
    const url = new URL(request.url);

    // 替换域名为OpenAI的API地址
    url.hostname = 'api.openai.com';

    // 创建新的请求
    const newRequest = new Request(url, {
      method: request.method,
      headers: request.headers,
      body: request.body
    });

    // 转发请求并返回响应
    const response = await fetch(newRequest);

    // 处理CORS跨域问题
    const newResponse = new Response(response.body, response);
    newResponse.headers.set('Access-Control-Allow-Origin', '*');
    newResponse.headers.set('Access-Control-Allow-Methods', 'GET, POST, PUT, DELETE, OPTIONS');
    newResponse.headers.set('Access-Control-Allow-Headers', 'Content-Type, Authorization');

    return newResponse;
  }
};
Here’s what this code does:
- Receives requests from the frontend
- Replaces the request domain with
api.openai.com - Forwards the modified request to OpenAI
- Returns OpenAI’s response back to the frontend unchanged
- Also handles CORS (cross-origin issues)
Click “Save and Deploy.”
Step 3: Test It
After deployment, you’ll see a Worker URL like https://openai-proxy.yourname.workers.dev.
Test it with curl (replace YOUR_API_KEY with your OpenAI key):
curl https://openai-proxy.yourname.workers.dev/v1/chat/completions \
  -H "Content-Type: application/json" \
  -H "Authorization: Bearer YOUR_API_KEY" \
  -d '{
    "model": "gpt-3.5-turbo",
    "messages": [{"role": "user", "content": "Hello!"}]
  }'
If you see a normal response from OpenAI, congratulations—you’ve succeeded!
Advanced: Support Multiple AI Services
Claude API Proxy
Claude’s API structure differs slightly from OpenAI’s, mainly in the request headers. Modify the code to support Claude:
export default {
  async fetch(request, env) {
    const url = new URL(request.url);

    // 根据路径判断是哪个服务
    if (url.pathname.startsWith('/claude')) {
      // 去掉/claude前缀,转发到Anthropic
      url.pathname = url.pathname.replace('/claude', '');
      url.hostname = 'api.anthropic.com';
    } else {
      // 默认是OpenAI
      url.hostname = 'api.openai.com';
    }

    const newRequest = new Request(url, {
      method: request.method,
      headers: request.headers,
      body: request.body
    });

    const response = await fetch(newRequest);
    const newResponse = new Response(response.body, response);
    newResponse.headers.set('Access-Control-Allow-Origin', '*');

    return newResponse;
  }
};
Now accessing /claude/v1/messages will forward to the Claude API.
Gemini API Proxy
Google’s Gemini API endpoint is generativelanguage.googleapis.com. Just add another condition:
if (url.pathname.startsWith('/gemini')) {
  url.pathname = url.pathname.replace('/gemini', '');
  url.hostname = 'generativelanguage.googleapis.com';
}
Now one Worker can proxy three AI services.
Security Best Practices
Don’t Hardcode API Keys
You might see some tutorials putting API Keys directly in Worker code—don’t do this! Code is stored in plain text and might accidentally get shared.
The correct approach is using environment variables. In Worker settings, find “Variables and Secrets” and add an environment variable:
- Name:
OPENAI_API_KEY - Value:
Your API Key - Type: Select “Secret” (encrypted storage)
Then use it in code like this:
export default {
  async fetch(request, env) {
    // 从环境变量读取API Key
    const apiKey = env.OPENAI_API_KEY;

    // 修改请求头,加上API Key
    const headers = new Headers(request.headers);
    headers.set('Authorization', `Bearer ${apiKey}`);

    // 后面的代码和之前一样...
  }
};
This way, the frontend doesn’t need to pass the API Key—much safer.
Add Custom Authentication Token
If you’re worried about someone discovering and abusing your Worker URL, add a simple authentication layer:
export default {
  async fetch(request, env) {
    // 检查自定义Token
    const authToken = request.headers.get('X-Custom-Auth');
    if (authToken !== env.MY_SECRET_TOKEN) {
      return new Response('Unauthorized', { status: 401 });
    }

    // 验证通过,继续处理请求...
  }
};
Set MY_SECRET_TOKEN in environment variables, and include this custom header when the frontend calls.
Monitor Usage
The Cloudflare console has an Analytics tab showing daily request volume, error rates, and other data. Check it regularly to catch any issues before exceeding the free quota.
You can also set up alerts: In “Notifications,” create a rule to email you when request volume approaches 100K.
Common Issues and Solutions
Slow Requests or Timeouts
If responses are particularly slow, the Worker might be assigned to a less-than-ideal node.
Solution: Bind a custom domain. Cloudflare optimizes routing based on your domain’s DNS configuration, usually faster than the free .workers.dev domain.
In Worker settings, select “Triggers” → “Add Custom Domain,” enter your domain (like api.yourdomain.com), and follow the prompts to add DNS records.
403 or 401 Errors
This usually indicates API Key issues:
- Check if the environment variable Key name matches what’s in the code
- Confirm the API Key is valid and has credit
- Check if OpenAI/Claude has regional restrictions (though Workers are globally distributed, some nodes might be identified)
Debugging tip: Add some logging in the code:
console.log('API Key:', env.OPENAI_API_KEY ? '已设置' : '未设置');Then check real-time logs in the Worker’s “Logs” tab.
What If Free Quota Isn’t Enough
If you find 100K really isn’t enough (like for commercial projects), consider the paid plan:
- Workers paid plan: $5/month, includes 10 million requests
- Overage: $0.50 per 1 million requests
Honestly, for small to medium applications, this is more cost-effective than buying your own VPS. Plus you don’t worry about server maintenance—the time saved is worth more.
Optimization tips:
- Add frontend caching—don’t repeat identical requests
- Use batch interfaces (if the API supports it) to reduce request count
- Use mock data during development instead of always calling the real API
Conclusion
After all that, the Workers proxy solution has three core advantages:
- Zero Cost: Free quota is more than enough for individual development
- Zero Barrier: 5-minute configuration, less than 30 lines of code
- Zero Risk: API Key stored securely, no leaks
This solution is particularly suitable for personal learning, demo development, and small projects. If you’re also looking for stable AI API access, definitely try Workers.
Go set one up now! Bookmark this article and come back if you run into issues. If you encounter other pitfalls during setup, share them in the comments—I’d love to know what else can be optimized.
By the way, the open-source projects mentioned in the article are all excellent, especially chatgptProxyAPI and worker-openai-proxy. The code is very clear—check them out on GitHub.
What solution are you currently using to access AI APIs? Let’s chat in the comments!
Published on: Dec 1, 2025 · Modified on: Dec 4, 2025
Related Posts
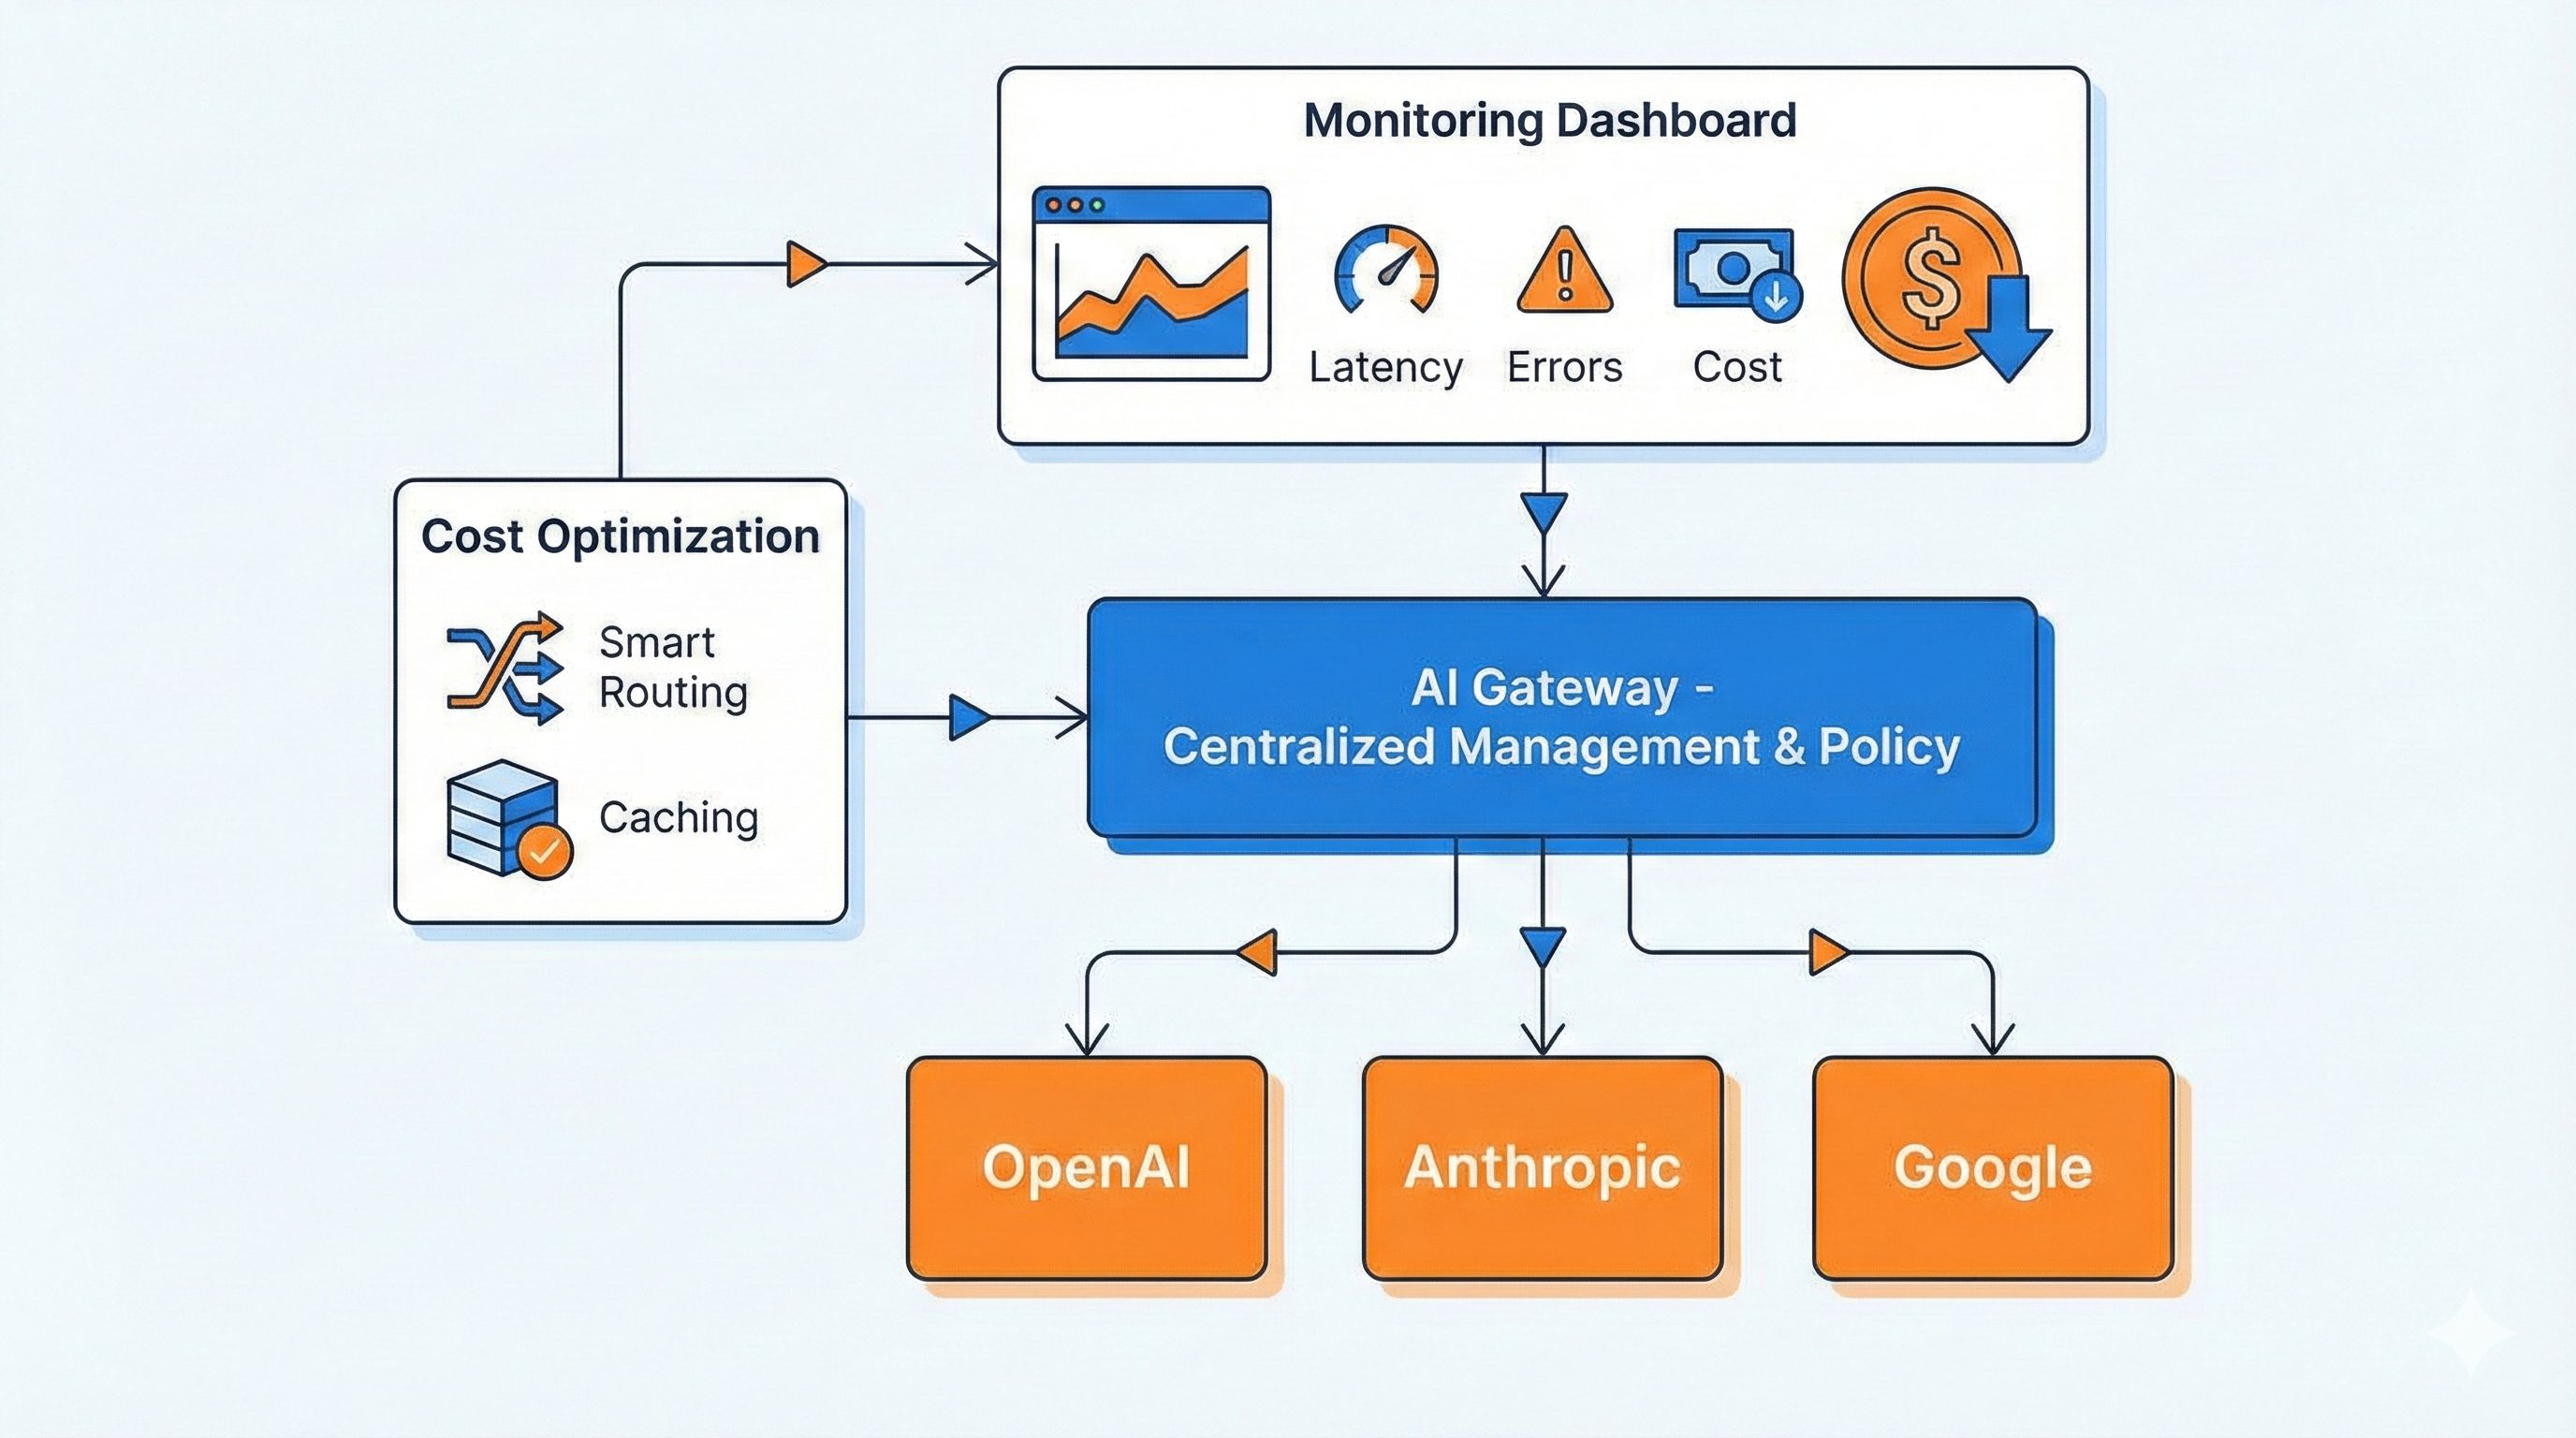
Tired of Switching AI Providers? One AI Gateway for Monitoring, Caching & Failover (Cut Costs by 40%)
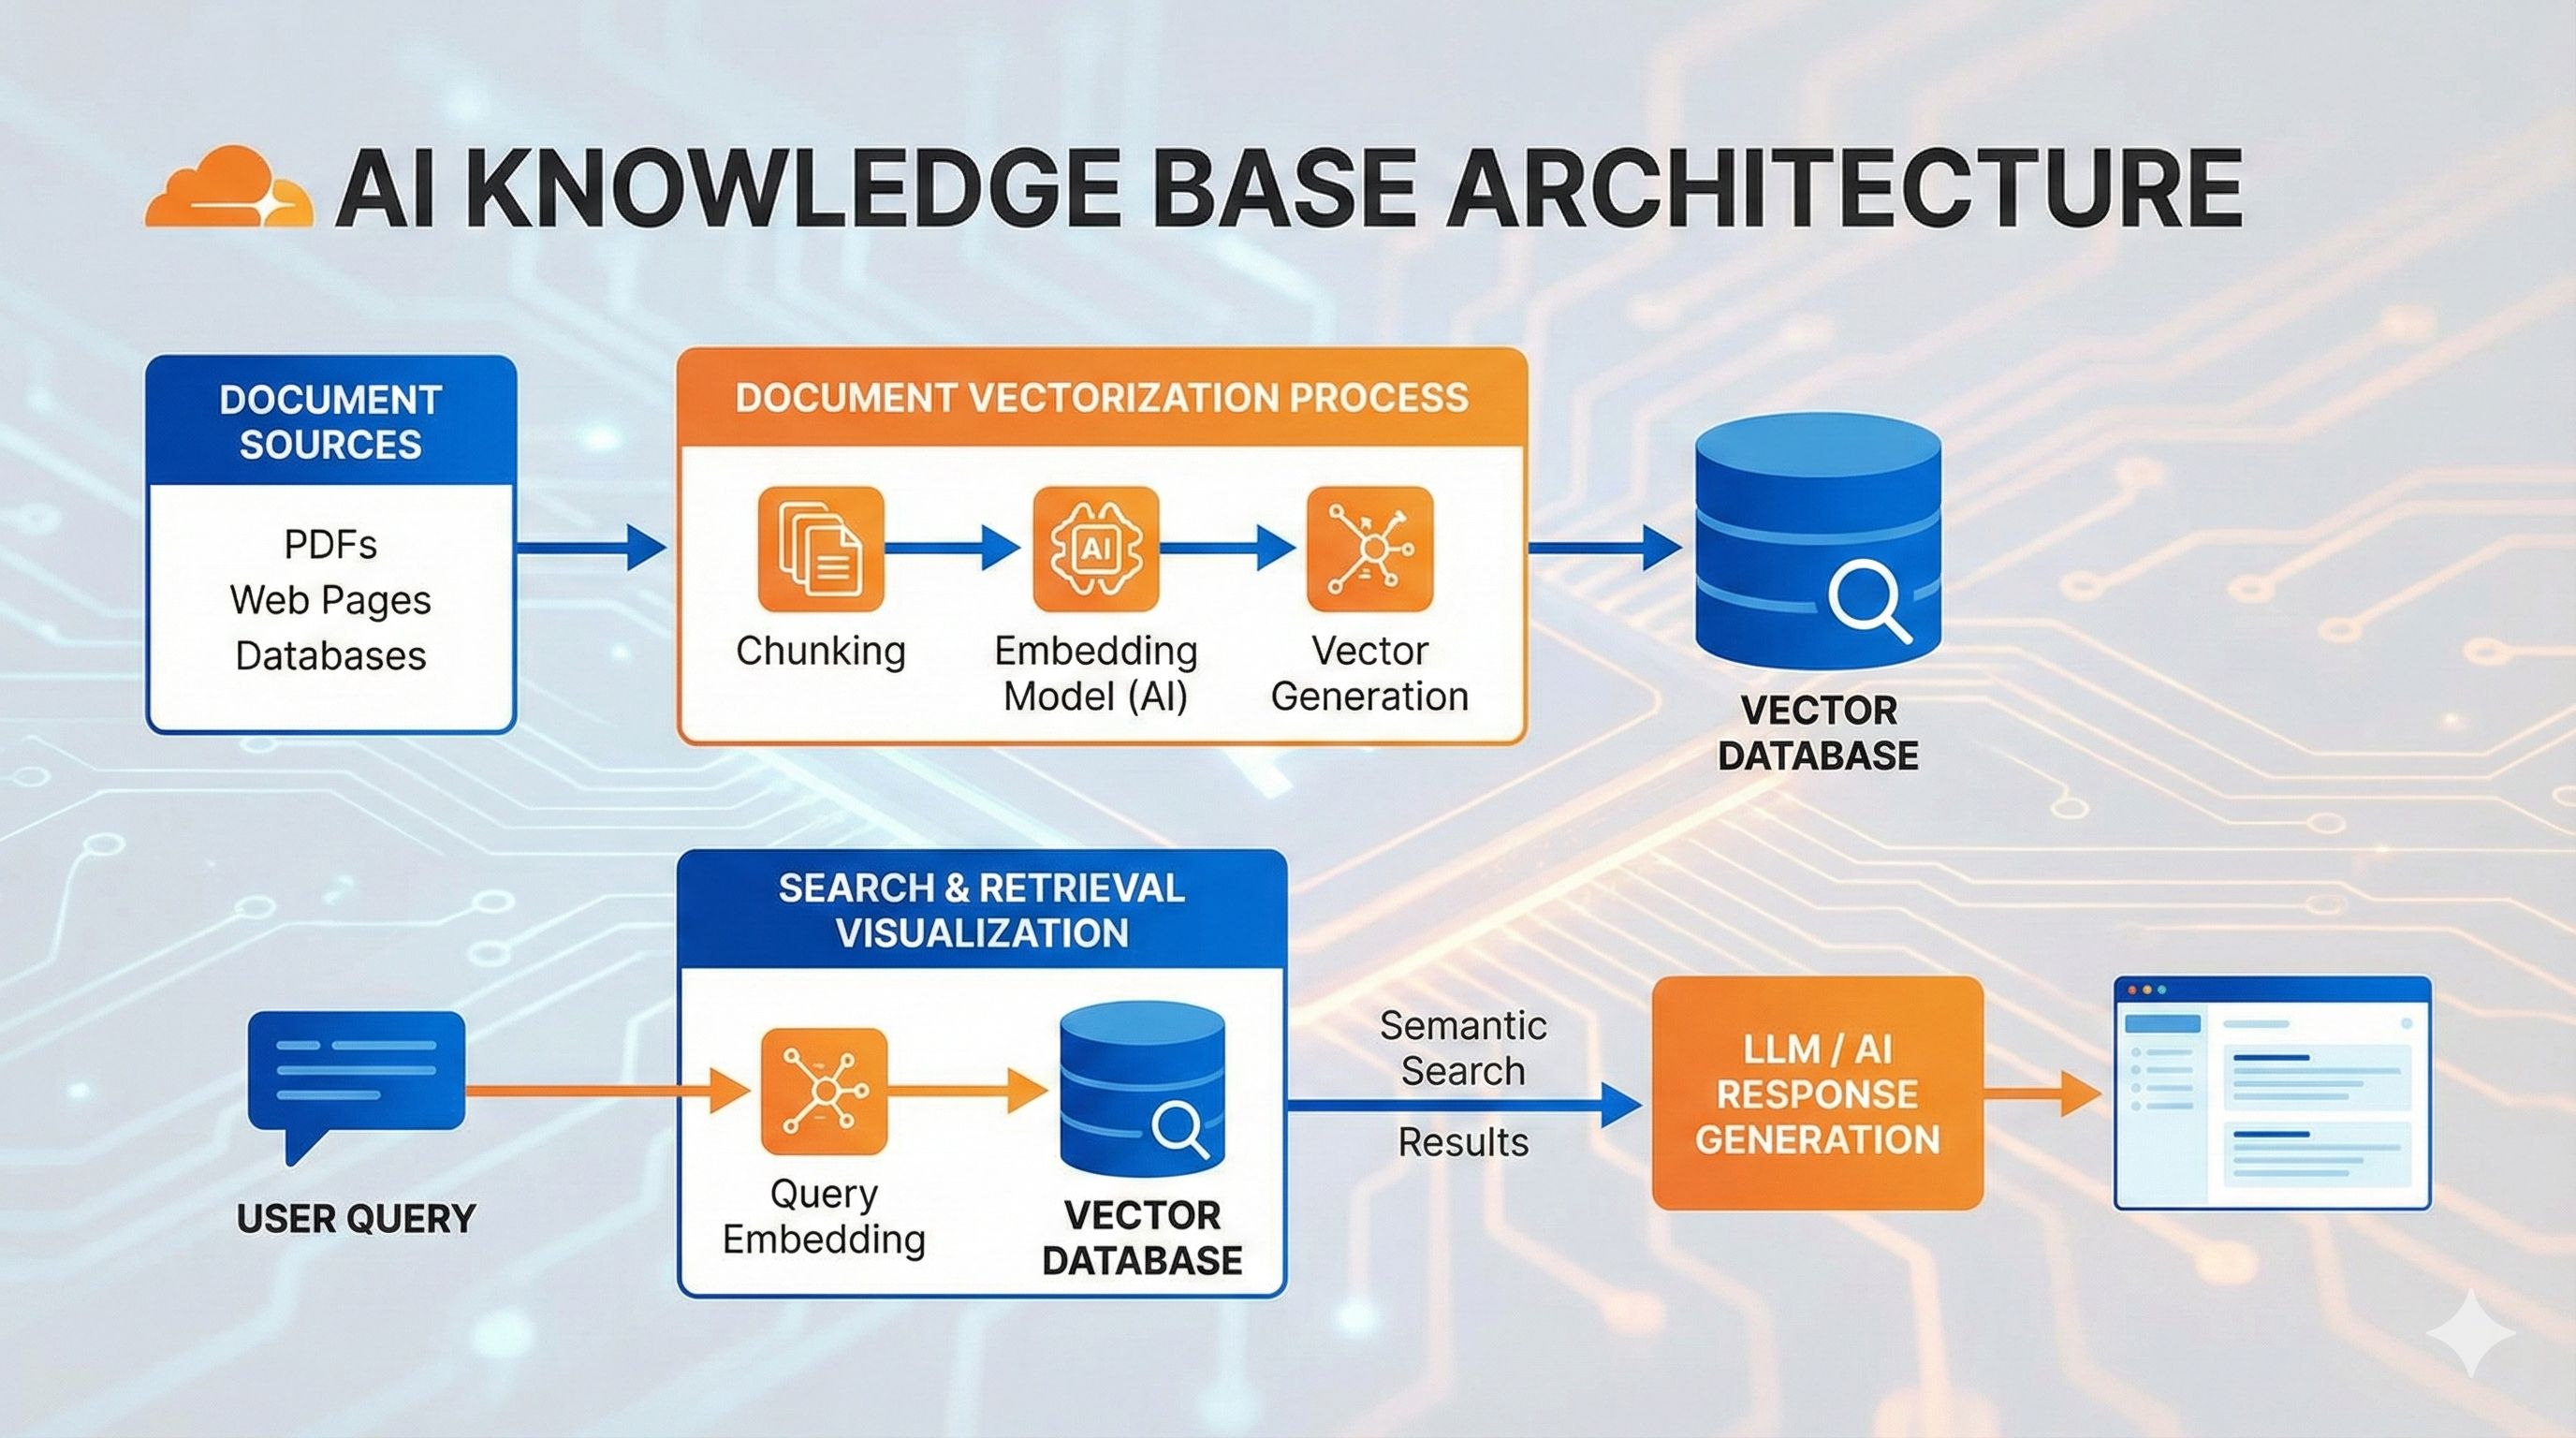
Build an AI Knowledge Base in 20 Minutes? Complete RAG Tutorial with Workers AI + Vectorize (Full Code Included)